


Hello Friends, In this blog post(How to send bulk emails using Sendgrid), I am going to explain how to send 40000 emails/month free using Sendgrid.
This free plan will be only for the first 30 days. After this, you can send only 100 emails/day forever.|How to send bulk emails using Sendgrid|
You will not need to add any credit card details to use this free plan.|How to send bulk emails using Sendgrid|
Within this blog, we will let you know in detail what is SendGrid SMTP. |How to send bulk emails using Sendgrid|
SendGrid is one of the best email marketing services or SMTP services which allows you to send a wide range of emails for free of cost.|How to send bulk emails using Sendgrid|
Is there any daily email sending quota using SendGrid? / How can I get free SMTP?
Actually, with this free plan, you are allowed to add only 2000 subscribers to your list using SendGrid.
So this means you can send any no. of emails to these subscribers until you reach your free plan limit.
for example, if you send an email template to these subscribers then you can also send another email campaign to the same
subscribers that you have uploaded to your account.
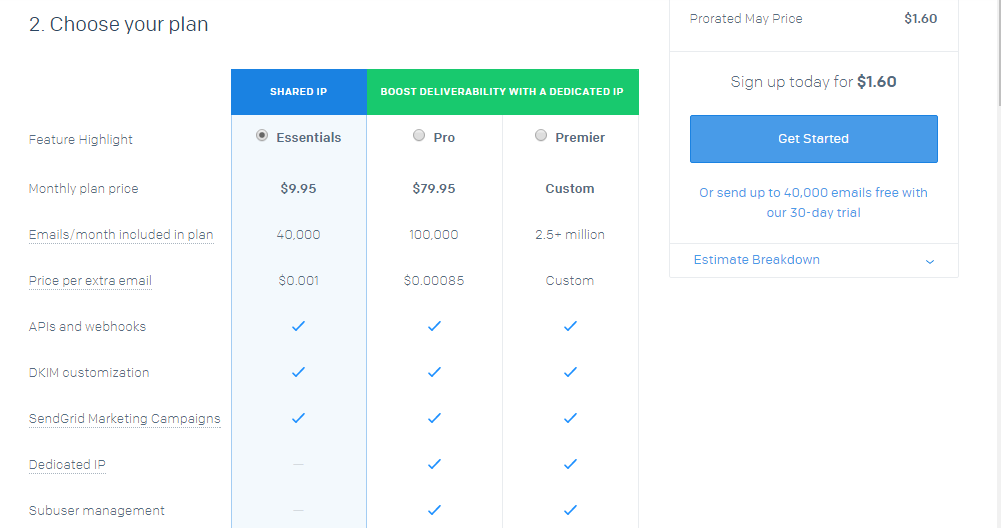
If you want to send more emails then you need to purchase a premium plan as per your requirement using SendGrid SMTP.
See the pricing plan: https://sendgrid.com/pricing/

What is the procedure for sending emails through SendGrid?/ How do I use SendGrid SMTP?
Just follow the given procedure step by step below.
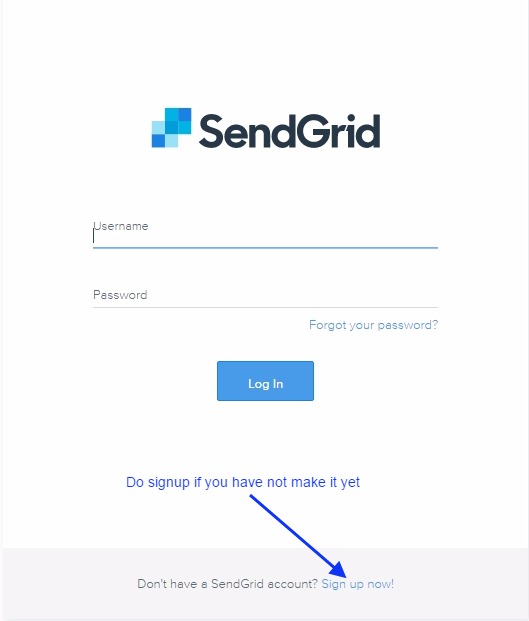
1. Sign up for your Sendgrid account if you have not signed up yet.
Login Link: https://app.sendgrid.com/login

2. Verify your email address using the SendGrid account.
Once you create your account then you will get a verification link in your account email inbox which you will fill in to create your SendGrid account.
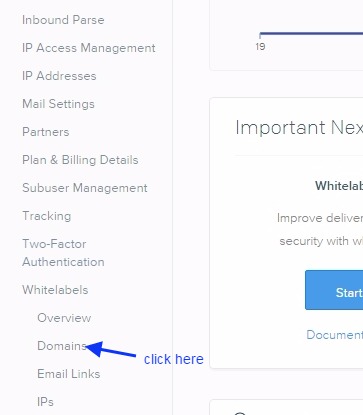
3. verify your domain address using the SendGrid account.
Click in the Setting Tab as shown in the below image.


After this click on Domain as shown in the below image.

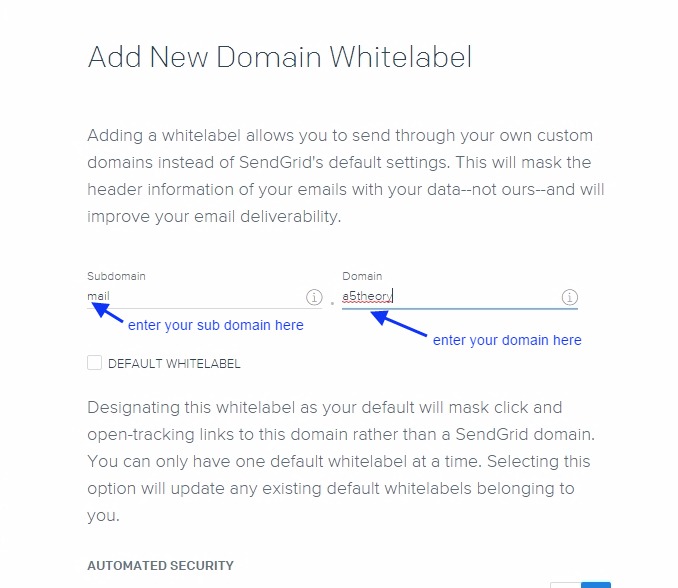
After this click on the Add new domain as shown in the below image.


Here, you need to insert your domain preceding the subdomain as shown in the below image.
Here one question arises in your mind what is this white label domain While registering a domain using SendGrid SMTP?
This is just a verification step where SendGrid ensures to the ISP that they(SendGrid SMTP) are sending Emails on behalf of the users.
So here you can verify several white label verifications like Email, domain, IP, etc.
So don’t confuse with this White label, this is just the verification process done to make a high email delivery rate.
For more information, you can go through the below extensive tutorial.
What is this White Label all about……..?


Once you get these records, you just need to copy this record to your domain hosting site.
You need to add these records to your domain hosting site. Let’s assume you have purchased your domain from Godaddy, then you need to add the records at Godaddy. This is a similar procedure for all domain hosting sites.
How to add the records at Godaddy?
Please follow the below procedure step by step.
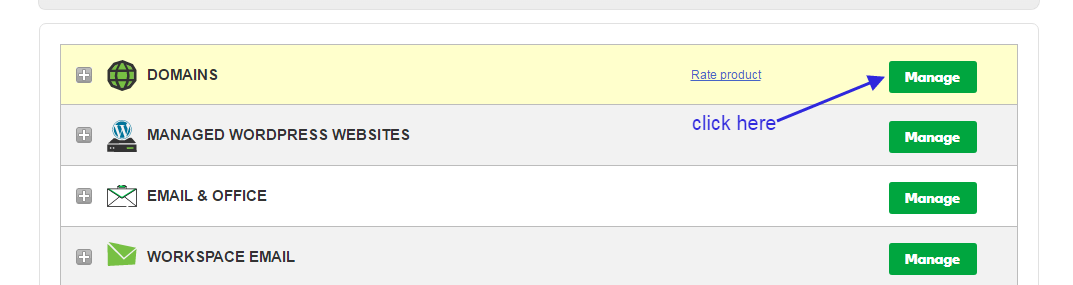
Login to your domain hosting site where have you purchased your- domain for example Login to Godaddy if you have purchased your- domain from Godaddy.


Click on Manage.

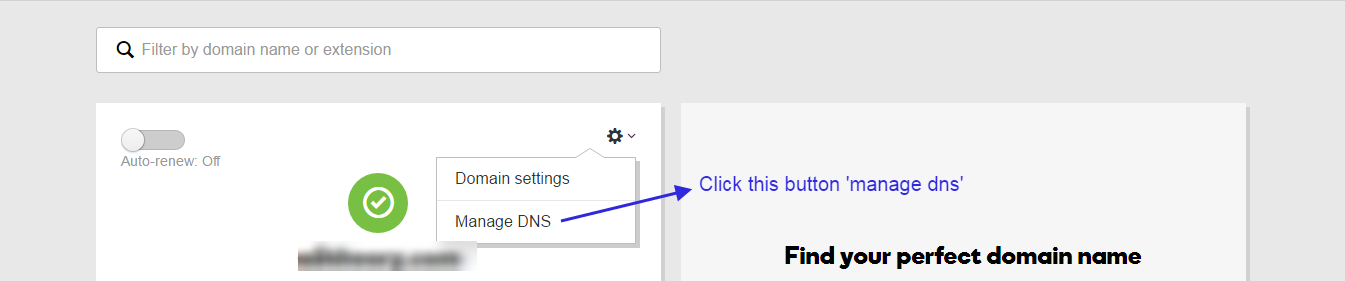
Click on Manage DNS.

Click on the Add button to add all the required values you have got above.
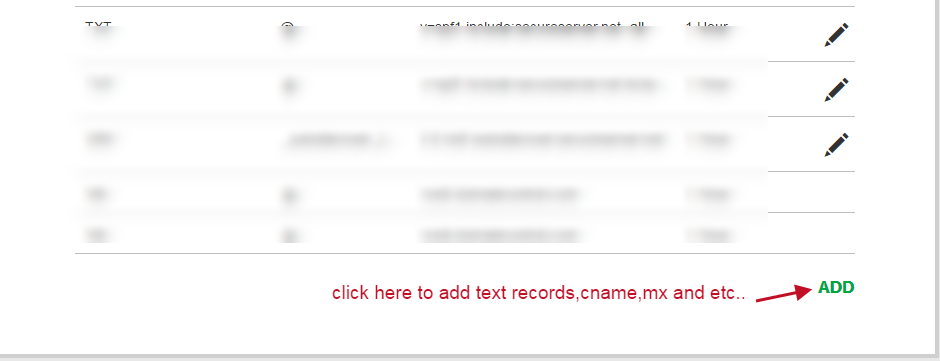

Here you can add all the values like TEXT, CNAME, MX, etc.
So just add all the values one by one. In the TTL field, you enter 1 hour as this field indicates the records update time.

Now you are ready to create your email templates and send them to your users.

Note: Once you add the SPF and DKIM records to your domain hosting site then it can take up to 24 hours to update your records.
How to Create & Send Email campaign using SendGrid….?
Just Go to the Template tab and then start creating your Email template and send it to your uploaded subscribers.


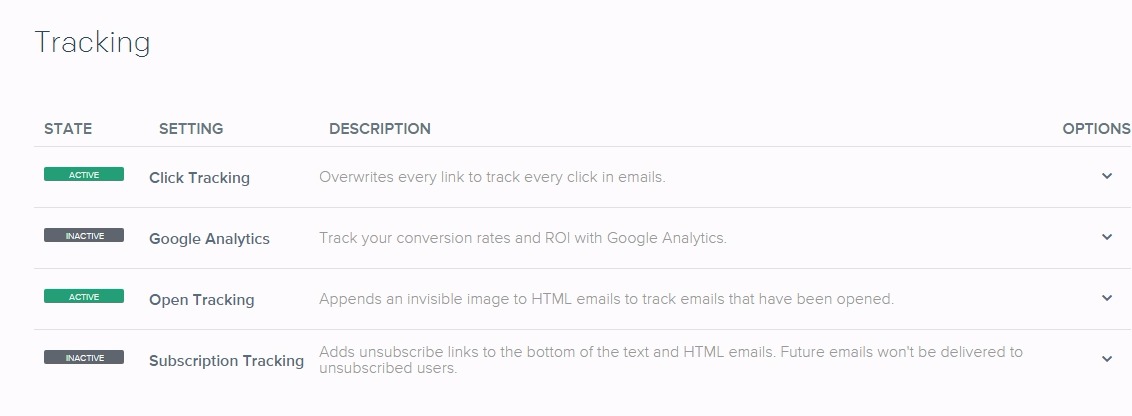
How to get the tracking report like open, Google Analytics, etc Using the SendGrid SMTP account?
you can this tracking report easily, just Go to Setting>>Tracking, see the below image.

What if you just use SendGrid SMTP Relay service for sending your email with third-party ESP….?
Yes, this is very simple to send Emails using SendGrid SMTP Relay.
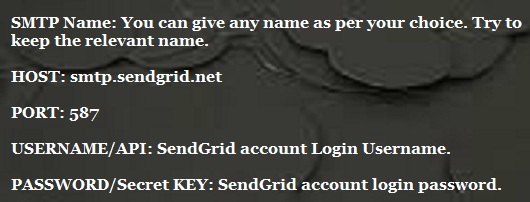
Please get the full SMTP relay details below which you can use for sending the emails using a third party.
From Email: Enter the email address that you have used to create the account of SendGrid.

How will I get the spam and bounce notification in my dashboard from the SendGrid account…?
You just Go to Setting>>Mail setting and then you can get spam, bounce, and many more stats in your third-party ESP dashboard, see the below image.
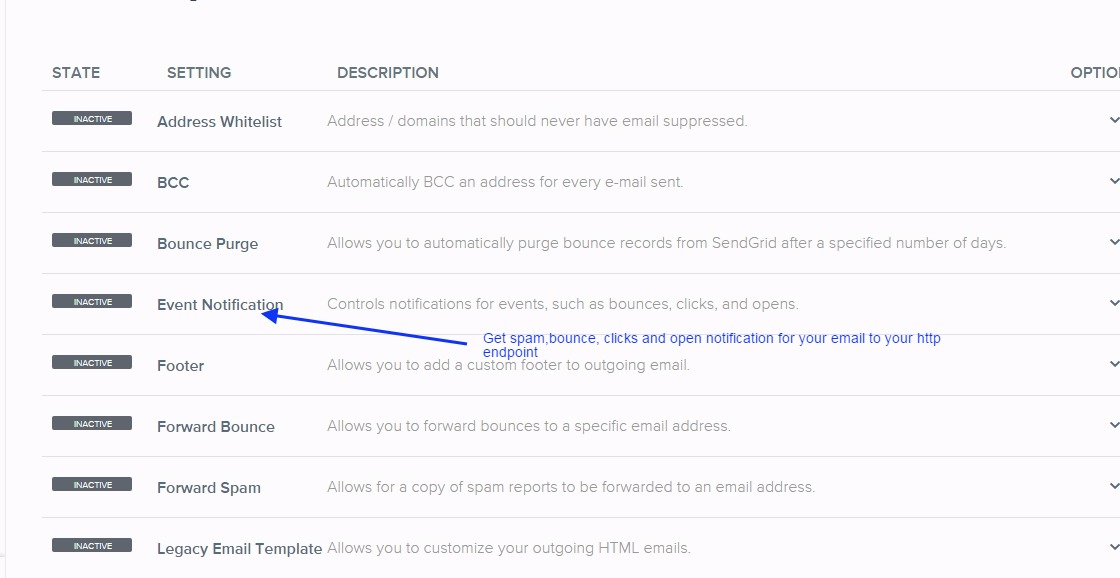

Here make the setting ON which you want to activate, here you activate the event notification and then enter the HTTP endpoint URL that you will get from your third-party ESP.


Here just check the box which and all information you need to show in your third-party ESP dashboard.
You are done with this setup and now you will start receiving the notification.


Conclusion:
In this blog post(How to send bulk emails using Sendgrid), we explained to you how to set up the SendGrid account step by step with the verification of email and domain. With the SendGrid free email sending trial, you can send 40000 emails for the first 30 days. Further, you can send 100 emails/day forever.
We know about SendGrid, What is SendGrid SMTP?, How do I use SendGrid SMTP?, SendGrid SMTP relay and complete SendGrid SMTP setting.|How to send bulk emails using Sendgrid|
In case of any queries, you can write to us at a5theorys@gmail.com we will get back to you ASAP.|How to send bulk emails using Sendgrid|
Hope! you would have enjoyed this post on How to send bulk emails using Sendgrid.
Please feel free to give your important feedback in the comment section below.|How to send bulk emails using Sendgrid|
Have a great time! Sayonara!
