


Hello Friends, In this blog post(How to Create Retro 3D Text with Photoshop) we are going to let you know about how to create retro 3D text with Photoshop. It is always attractive to see text in any design effect, and if it is in 3-D then it adds extra value and attention to our text. So within this blog, we are going to discuss the procedure for creating 3D text using Photoshop.
If you wish to make 3D text using this amazing Photoshop technique to use where in your website or work then please follow the below-given step-by-step procedure(How to Create Retro 3D Text with Photoshop) for the same.
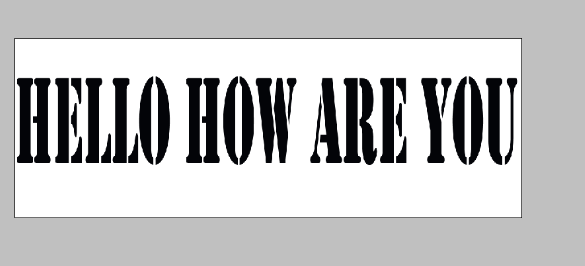
Create a new document and then write the text inside it using the text tool. Make sure the size of the text is big and bold and you can also make them italic though we have done italic in this blog explanation. See the below image where we have written some text to give it a 3D effect|How to Create Retro 3D Text with Photoshop|

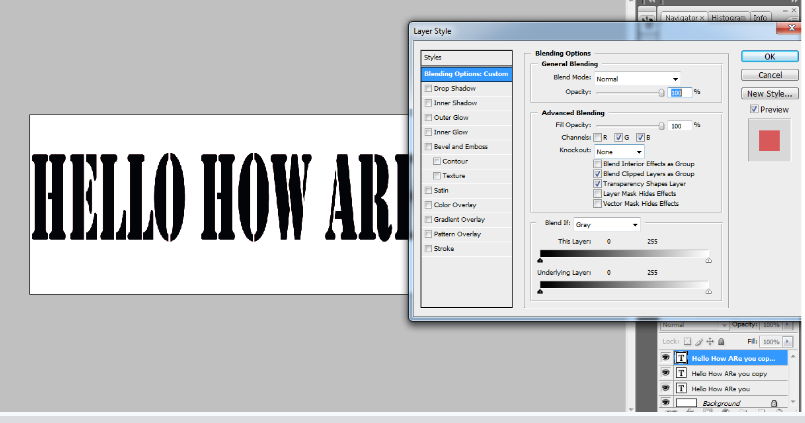
Now, make a copy of this text layer two times as shown in the below image.


Now with the selection of the top layer, just selection select the blending option which you can get by clicking the fx below in the layer panel.
Then you just need to uncheck the red channel as shown in the below image and then click ok and close the dialog box.

But, you will not see any changes instantly as shown below.
Here you can see the same image as we had before in the above step.


So now to see any changes we need to select the move tool and then move the cursor or pointer from left to right.
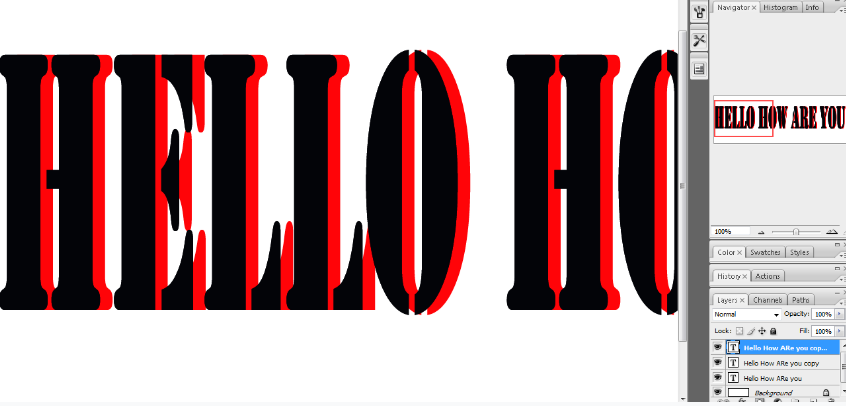
Now you will see the red color text coming slightly below the black color text.

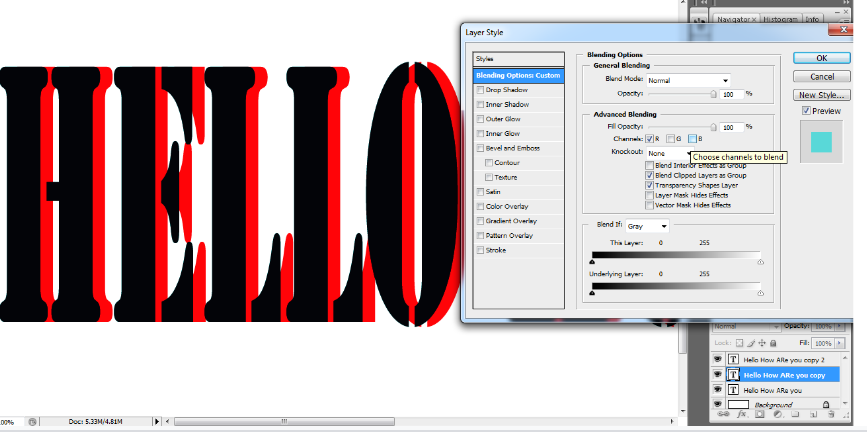
Now we will again open the blending dialog box with the selection of the second topmost layer and this time we will uncheck green and blue colors and close the blending dialog box.
But again we will not see any changes until we use the move tool to drag the text surface.

Now With the pointer over the text just drag the pointer from right to left and then you will that green color coming out


Here, you can see a clear image of text where three colors are visible which gives a 3D effect to the text as shown in the below image.
If you want a clear and big picture then select the big font in italic style.


You can also go through a few more blog links below related to Photoshop:
How do I quickly remove a tree background in Photoshop In Hindi…
How to Add Falling Snow to Your Photos with Photoshop…
How To Create A Starry Night Sky In Photoshop…
How to Turn A Photo Into A Collage With Photoshop In Hindi…
How to Add a Border to a Photo with Photoshop In Hindi…
How to Turn A Photo Into A Collage With Photoshop…
How to crop a circular image in Photoshop in Hindi…
Retro 3D Text with Photoshop in Hindi…
clipping mask in Photoshop in Hindi…
Conclusion:
So this blog post(How to Create Retro 3D Text with Photoshop) was all about Retro 3D Text with Photoshop. This is very simple just duplicate your text layer two times and blend each layer with RGB check/uncheck modification. Just move the text left and right by selecting each layer one by one.
In the case of any queries, you can write to us at a5theorys@gmail.com we will get back to you ASAP.
Hope! you would have enjoyed this post about How to Create Retro 3D Text with Photoshop.
Please feel free to give your important feedback in the comment section below.
Have a great time!
