hello friends, In this blog post(How to Turn A Photo Into A Collage With Photoshop) we are going to let you know how to turn a photo into a collage with Photoshop. This is a very interesting Photoshop technique that helps us in building a beautiful collage.
Sometimes, this type of image collage is very useful for our personal and professional work such as making any design presentation, decorating the home wall, and using it on our website|How to Turn A Photo Into A Collage With Photoshop|
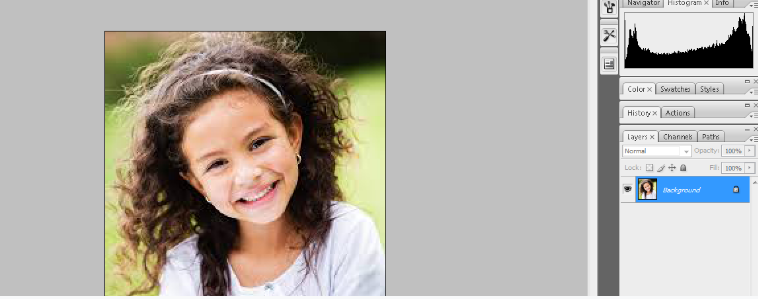
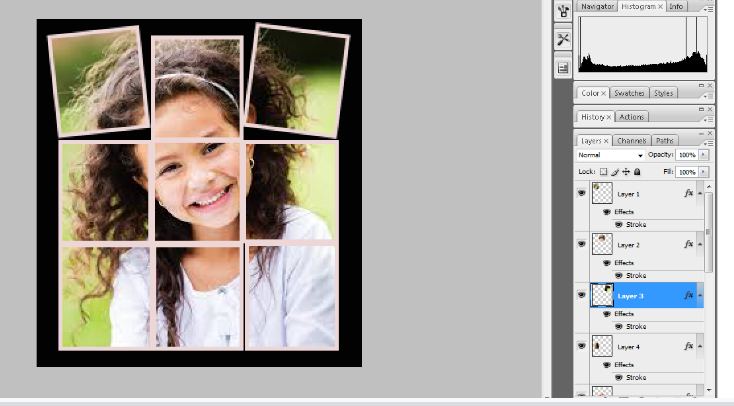
See the input and output images that we will make in this tutorial(How to Turn A Photo Into A Collage With Photoshop)
Input Image
Output Image:
this is a really simple functionality and if you want to learn this functionality then please follow the below-given procedure(Turn A Photo Into A Collage With Photoshop) step by step.
First, open an image within your Photoshop IDE that you want to make a collage of.
After this, if your image is pretty big and has more free space than the main subject or image then you have to crop your image by setting the square aspect ratio.
But in our case here, we don’t need to crop our image as we have a fixed length and subject covering the image here.
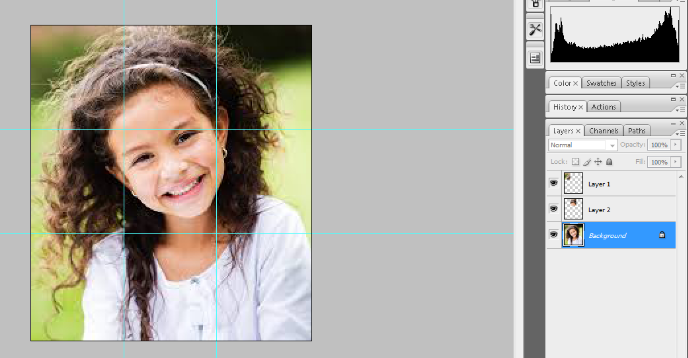
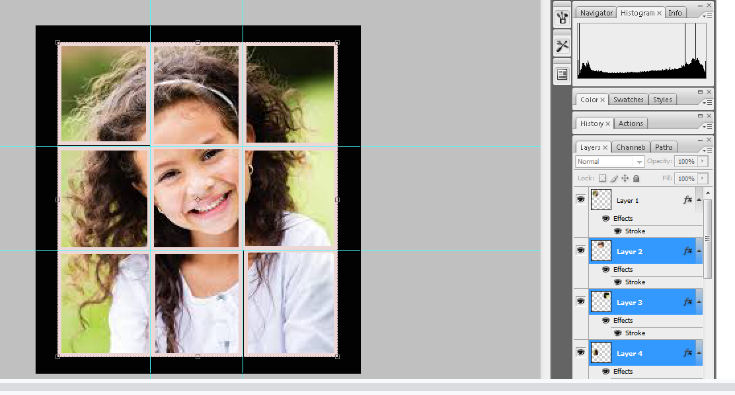
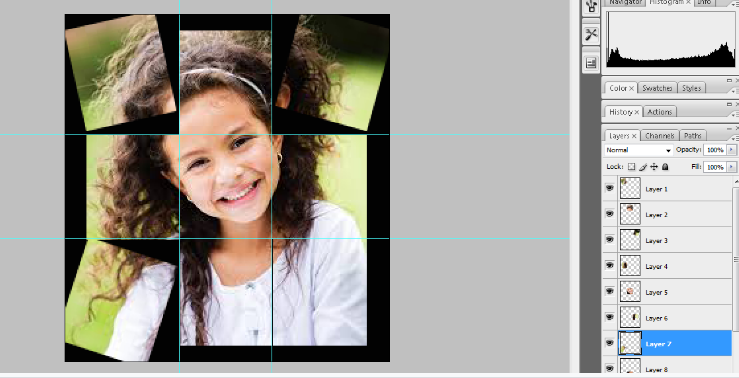
Now, we have to partition our image into different 2 slots or square parts.
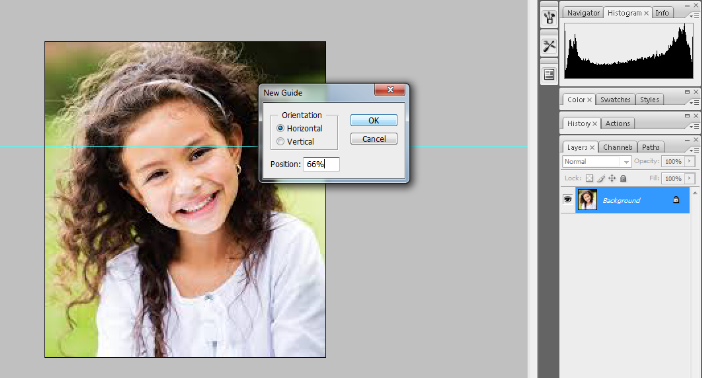
To do this we have to go to the main menu and then click view->new guide.
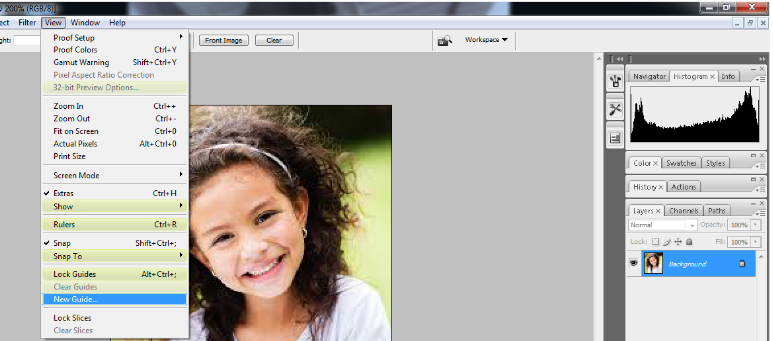
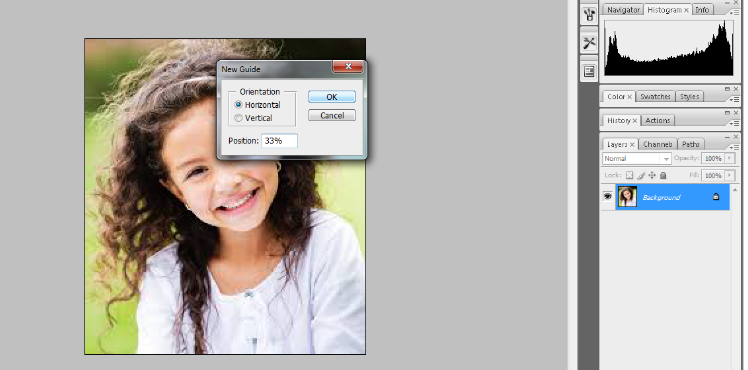
First, make the horizontal guide with 33%.
Again select the new guide option with 66%.
Now we will make a vertical guide. Go to the main menu and click Overview -> New Guide.
Now make the vertical guide 33%.
Now make another vertical guide of 66%.

Now our guide work has been completed.
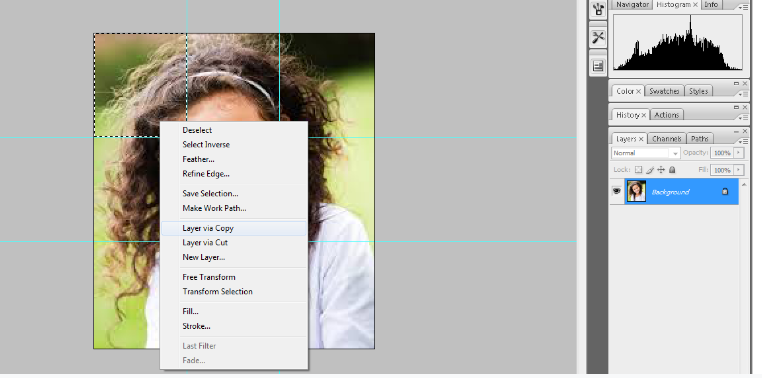
Now we will select the square marquee tool and now we will copy the layer of each square in the image and then in total.
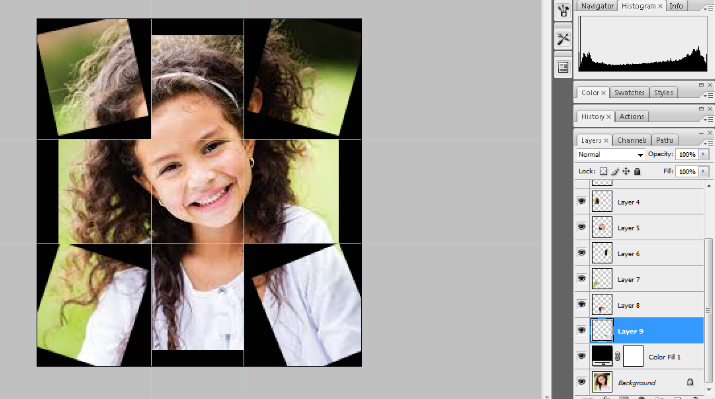
We will have 9 squares after the complete selection.
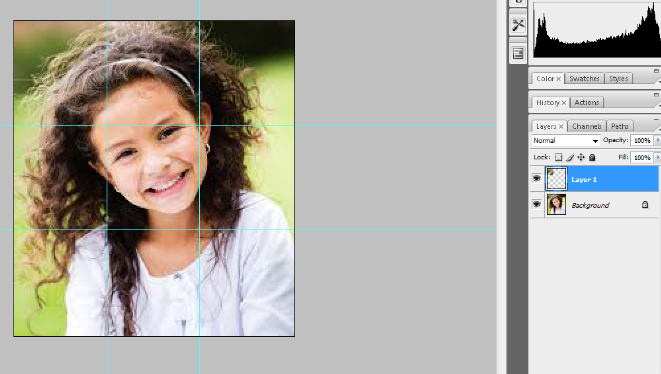
First, we select the first square and then click on a layer-by-copy option and then we get layer 1 in the layer panel having a small part of our full image.
Make sure you always keep a selection on the background image while making these layers by copy.
In this way, we also make the second square and then make it layer by copy and we see layer 2 in the layer panel.
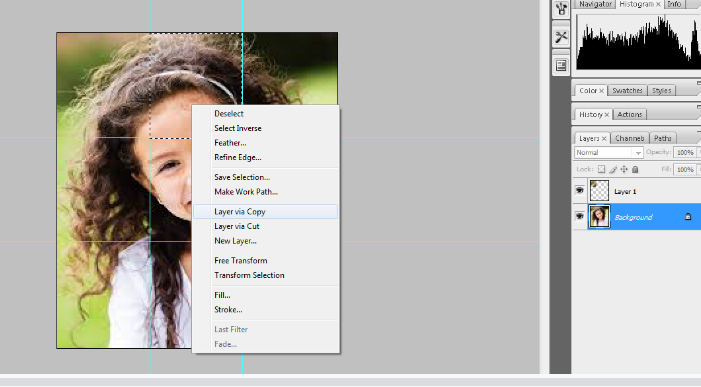
Now we repeat the same process for all the 9 square sections in the images that we have created with the help of a guide.
So finally we get a total of 9 layers having the small parts of our full image.
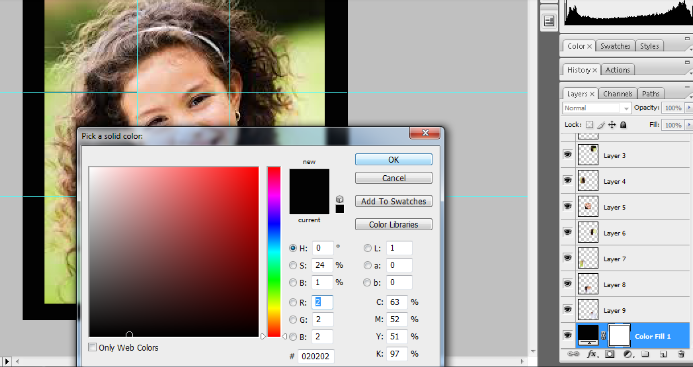
Now we need to create some border space around the image.
Select the crop tool and then cover the full image boundaries.
Then hold the ALT key and then drag the transformation line on all four sides and make a border around the image.
Now we can fill the color as we fill black color here in our case. Now you can see the image collage surrounded by black color.
Now we get our full image into the separated parts but something is missing that can make this collage more attractive.
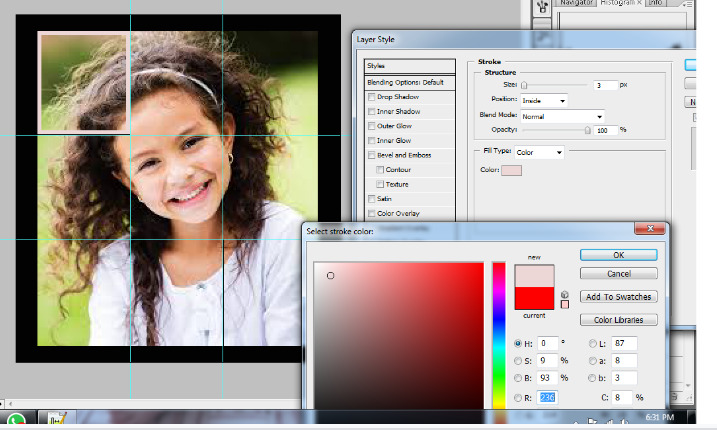
Now we need to add the stroke effect to our image.
First, select layer 1 and then click the ‘add layer style’ option bottom of the layer panel.
Then select the stroke and click on it.
Set the parameter as radius and choose the option inside it.
Now click ok and you can see the stroke effect in the first square frame. Now copy this stroke effect layer 1.
See the below image for the same.
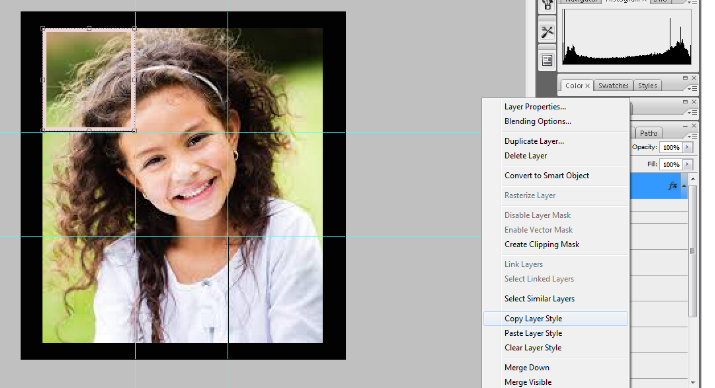
Now click on layer 2 and then paster the layer properties of layer 1.
Now you can see the same stroke effect in the second square frame.
Now hold the shift key and then click on layer 9 and you will see the selection of all the above layers up to 3.
Now paste the same layer properties of layer 1 and layer 2.
Now your stroke is done to all the images. Now it’s time to transform the image.
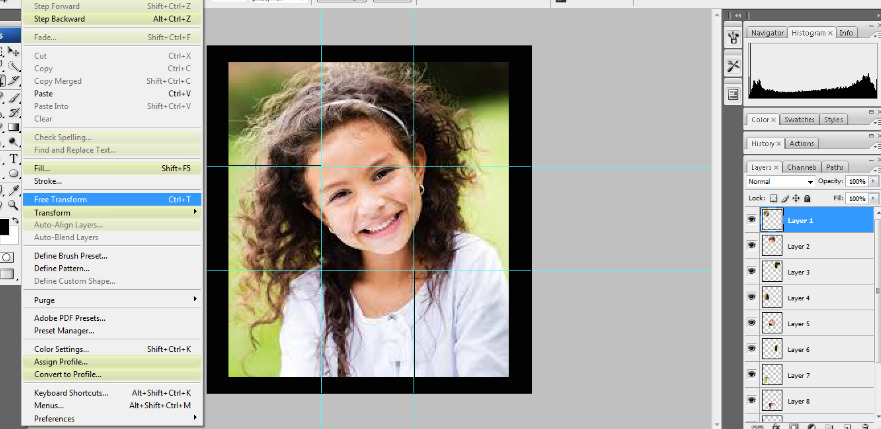
Now we select layer 1 and move tool and then select click Edit->free transform.
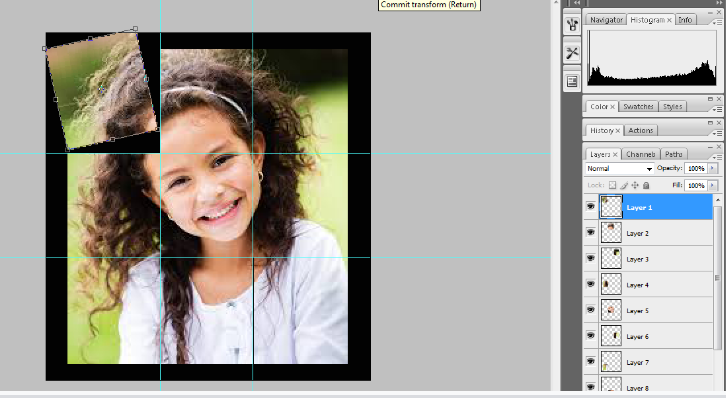
Now you can have rotation to your layer1 or first frame as per your requirement and you can also displace its position as per your desire.
Similarly, you can rotate all the square frames inside your image and provide it with an amazing and interesting look as per your desire.
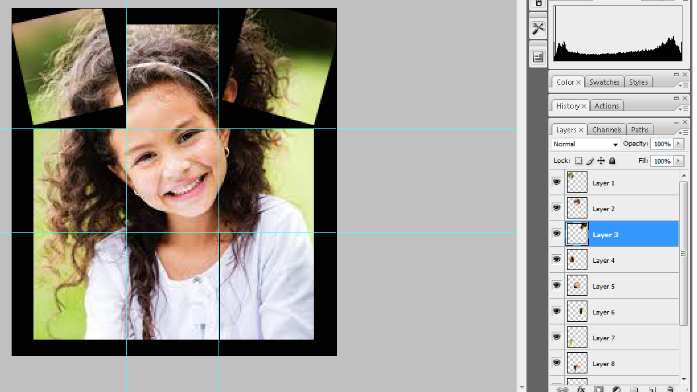
You can also change the border color or background color and update it to a matching color with your image.
Now we get our final collage with some rotation and image displacement.
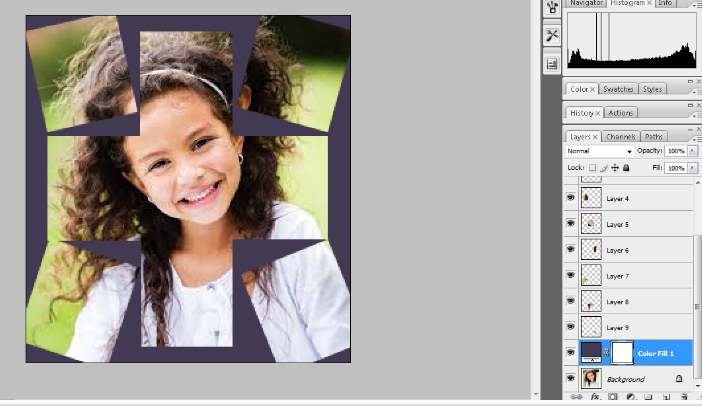
If we don’t add the stroke in our image and we just use the free transform option without using the stroke effect then how would our college look?
Select layer 1 and then choose edit->free transform in the menu bar.
move the first square block of your image. See the below image for the same.
Select layer 3 and then repeat the same action go to edit->free transform and then move your block.
See the below image for the same.
Select layer 7 and repeat the same action as we did above.
Now, select layer 9 and repeat the same action as we did above.
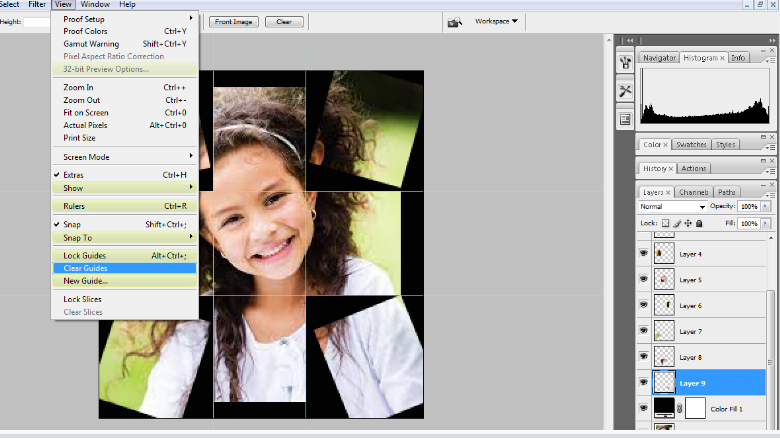
After all the free transform happens as per your desire then please clear all the guides as we have applied in starting.
Now you get your final collage without any stroke effect. See the below image for the same.
You can also go through a few more blog links below related to Photoshop:
How do I quickly remove a tree background in Photoshop In Hindi…
How to Add Falling Snow to Your Photos with Photoshop…
How To Create A Starry Night Sky In Photoshop…
How to Turn A Photo Into A Collage With Photoshop In Hindi…
How to Add a Border to a Photo with Photoshop In Hindi…
How to Turn A Photo Into A Collage With Photoshop…
How to crop a circular image in Photoshop in Hindi…
Retro 3D Text with Photoshop in Hindi…
clipping mask in Photoshop in Hindi…
Conclusion:
So friends, In this blog post (How to Turn A Photo Into A Collage With Photoshop) we have learned to design a new Photoshop technique which is building an image collage with the help of Photoshop. It is very beautiful and attractive after getting full effects. One can use it for a website, or any other personal or professional use. This is simple to design this image collage with the help of Guide, crop, and free transform properties in Photoshop.
In the case of any queries, you can write to us at a5theorys@gmail.com we will get back to you ASAP.
Hope! you would have enjoyed this post about How to Turn A Photo Into A Collage With Photoshop.
Please feel free to give your important feedback in the comment section below|How to Turn A Photo Into A Collage With Photoshop|
Have a great time!