

Hello Friends, in this blog post, we are going to discuss “Microsoft PowerPoint for beginners“.
From students and teachers to professionals and businesses, it is one of the most popular applications used for making presentations.
Using slides with text, images, charts, diagrams, videos, and visual elements, users can effectively convey their ideas.
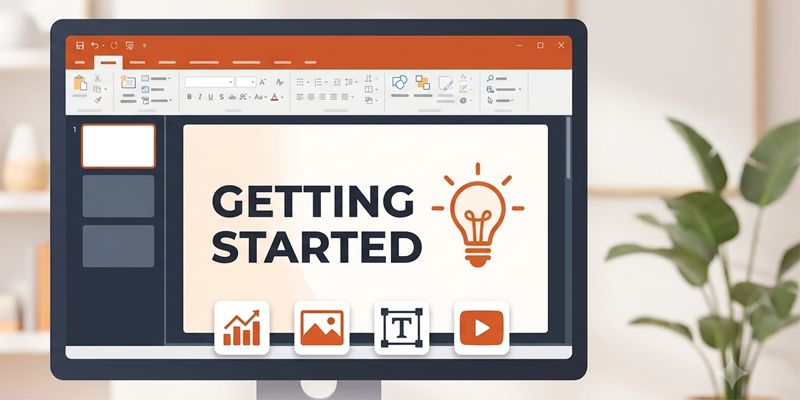
Microsoft PowerPoint is of great use in preparing school projects, college seminars, training sessions, business proposals, or office meetings.
Using this amazing tool, it becomes very easy to organise and present information in a proper and clear manner.
Though, just adding some text to the slides does not make your presentation effective.
To make it effective, you need to structure your content properly, choose correct layouts, use readable fonts, and add relevant visuals.
In this post, we are going to explore “Microsoft PowerPoint for beginners” in easy-to-understand language.
Here we will learn to create your very first professional-looking presentation step by step.
1. What Is Microsoft PowerPoint?
Microsoft PowerPoint(Microsoft PowerPoint for beginners) is a presentation application included in many Microsoft Office and Microsoft 365 offerings. It helps users organise information into individual slides that can be displayed on a computer, projector, or compatible screen.
PowerPoint presentations can also be shared digitally or exported into formats such as PDF and video, depending on the available features and settings.
Common Uses of PowerPoint
PowerPoint is useful in many situations:
- Education: Prepare classroom lessons, student projects, assignments, and seminars.
- Business: Present proposals, sales figures, marketing plans, and project updates.
- Training: Explain processes, demonstrate procedures, and introduce new concepts.
- Marketing: Showcase products, services, campaigns, and business achievements.
- Personal projects: Create photo slideshows, event presentations, and portfolios.
Its main advantage is that it combines written information with visual communication in a structured format.
2. How to Open Microsoft PowerPoint
Before creating your first presentation, you need access to PowerPoint(Microsoft PowerPoint for beginners).
Depending on your subscription, licence, and device, you may be able to use the desktop application or PowerPoint for the web.
Open PowerPoint on Windows
- Open the Windows Start menu.
- Type PowerPoint in the search box.
- Select Microsoft PowerPoint from the results.
- Wait for the application to open.
- Choose a blank presentation or an available template.
If PowerPoint is not installed, check whether your Microsoft Office or Microsoft 365 licence includes it. You can also check the official Microsoft 365 website for available web-based options.
Create a New Presentation
When PowerPoint opens, you can generally choose between two options:
- Blank Presentation: Start with a simple presentation and customise it yourself.
- Template: Start with a predefined design that includes layouts, colours, and formatting.
For beginners, a blank presentation is useful for learning the basics. A template can save time when you need a polished design quickly.
3. Understand the PowerPoint Interface
Learning the main parts of the PowerPoint window will make it easier to create and edit slides.
Ribbon
The Ribbon appears at the top of the application and contains tabs such as Home, Insert, Design, Transitions, Animations, Slide Show, and Review.
Each tab provides tools for specific tasks.
Slides Pane
The Slides pane displays small previews of your slides. You can select a slide, change its position, duplicate it, or delete it.
Slide Workspace
The main workspace displays the currently selected slide. This is where you add and arrange text, pictures, shapes, and other content.
Notes Area
The Notes area allows you to add speaker notes that help you remember important points during your presentation.
Status Bar and View Controls
These controls can help you change the presentation view and adjust the zoom level.
Once you understand these elements, navigating PowerPoint becomes much easier.
4. Create Your First Slide
The first slide usually introduces your topic and gives the audience an idea of what the presentation will cover.
Add a Title Slide
- Open PowerPoint.
- Select Blank Presentation.
- Choose the title slide layout if it is not already selected.
- Click the title placeholder.
- Enter your presentation title.
- Add a subtitle containing your name, organisation, class, or date if appropriate.
For example, if your topic is renewable energy, your title could be “Renewable Energy: Sources, Benefits, and Future”.
Keep the title short enough to read easily. Avoid filling the opening slide with long paragraphs.
Choose a Suitable Title
A good presentation title should communicate the subject clearly. Use specific wording rather than a vague heading such as “My Project” when a more descriptive title is possible.
Your opening slide should look clean and organised.
5. Add, Delete, Duplicate, and Rearrange Slides
Most presentations require several slides. PowerPoint makes it easy to manage them.
Add a New Slide
- Select the Home tab.
- Click New Slide.
- Choose a suitable layout.
- Add your content.
You can also press Ctrl + M on Windows to insert a new slide.
Delete a Slide
Select the slide thumbnail in the Slides pane and press Delete, or use the available Delete Slide command.
Duplicate a Slide
Right-click a slide thumbnail and select Duplicate Slide. This is useful when you want to reuse a layout or maintain consistent formatting.
Rearrange Slides
Select a slide thumbnail and drag it to the desired position.
For a simple presentation, a useful sequence is:
- Title and introduction.
- Background or overview.
- Main points.
- Examples, evidence, or supporting information.
- Conclusion and key takeaways.
Planning the order before adding detailed content can make your presentation easier to follow.
6. Choose the Right Slide Layout
A slide layout determines how text and other content are arranged.
PowerPoint provides several common layouts, including:
- Title Slide: Introduces the presentation.
- Title and Content: Provides a title and a main content area.
- Section Header: Introduces a new section.
- Two Content: Displays two content areas side by side.
- Comparison: Helps compare two subjects.
- Blank: Gives you complete freedom to design the slide.
To change a slide layout, select the slide, open the Home tab, choose Layout, and select the layout you need.
Choose layouts according to your content. For example, a comparison layout is useful for presenting the advantages and disadvantages of two products.
Avoid adding content simply because a placeholder exists. Every slide should serve a clear purpose.
7. Format Text and Improve Readability
Text formatting helps your audience identify headings, supporting points, and important information.
Choose Readable Fonts
Use clear fonts that are easy to read on a screen. Common options include Aptos, Arial, and Calibri, depending on your installed fonts and design requirements.
Use one or two font families throughout the presentation rather than switching styles on every slide.
Set Appropriate Font Sizes
As a practical starting point:
- Main slide titles: approximately 28–36 points.
- Body text: approximately 20–28 points.
- Supporting labels: large enough to remain readable from the back of the room.
The ideal size depends on the display, room, and amount of content. Always preview the presentation at a realistic viewing size.
Use Formatting Consistently
Use bold text for important terms and keep alignment consistent. Avoid underlining or italicising large amounts of text unless there is a clear reason.
Keep Slides Concise
A slide should support what you say rather than reproduce your entire speech.
Instead of writing a long paragraph about renewable energy, you might use three short points:
- Reduces dependence on fossil fuels.
- Can lower emissions during electricity generation.
- Supports diversification of energy sources.
You can explain the details verbally or in your speaker notes.
8. Apply a Theme and Background Design
A theme provides coordinated colours, fonts, and visual styling for your presentation.
How to Apply a Theme
- Open the Design tab.
- Browse the available themes.
- Select a theme to apply it to your presentation.
- Explore the Variants or other design options if available.
- Check the readability of text against the background.
A consistent theme makes your slides look more organised and professional.
Choose Suitable Colours
Use colours that provide sufficient contrast. Dark text on a light background and light text on a dark background can both work well when the contrast is strong.
For a business presentation, use a restrained colour palette. For an educational presentation, you can use more colour while keeping the layout consistent.
Avoid patterned backgrounds that make text difficult to read.
9. Insert Pictures, Shapes, and Icons
Visual elements can make a presentation more engaging and help explain complicated ideas.
Insert a Picture
- Select the slide where you want to add an image.
- Open the Insert tab.
- Choose Pictures.
- Select the appropriate source or file.
- Insert the image and adjust its size and position.
Use relevant, good-quality images. Ensure that you have permission to use images in public or commercial presentations when required.
Insert Shapes
PowerPoint provides shapes such as rectangles, circles, arrows, and callouts. These are useful for diagrams, process explanations, and highlighting important information.
Select Insert → Shapes, choose a shape, and draw it on the slide.
Use Icons
Where supported, you can insert icons to represent concepts such as communication, security, technology, or teamwork.
Use icons consistently. Too many decorative images can distract the audience from the main message.
10. Insert Charts and Tables
Charts and tables help you communicate numerical information clearly.
Insert a Chart
- Select the slide where the chart is needed.
- Open the Insert tab.
- Choose Chart.
- Select an appropriate chart type.
- Enter or edit the data in the associated spreadsheet.
- Add a descriptive chart title and clear labels.
Column charts are useful for comparisons, while line charts are often suitable for showing trends over time.
Use only the data needed to support your message. An overcrowded chart can be harder to understand than a simple one.
Insert a Table
Select Insert → Table, then choose the required number of rows and columns.
Tables are useful for comparing prices, features, schedules, and other structured information.
Keep tables readable by avoiding excessive rows, small text, and unnecessary borders. If a table is too large, split it across multiple slides or summarise the key findings.
11. Use Transitions and Animations Carefully
Transitions control how one slide changes to the next. Animations control how individual objects appear, move, or disappear on a slide.
Add a Slide Transition
- Select a slide.
- Open the Transitions tab.
- Choose a transition effect.
- Adjust the available effect options or duration.
- Preview the result.
Add an Animation
- Select the object you want to animate.
- Open the Animations tab.
- Choose an animation effect.
- Configure its timing and start options.
- Preview the animation.
Transitions and animations can be useful when they support the message, such as revealing the steps of a process one at a time.
However, excessive effects can make a presentation distracting or appear unprofessional. Simple and consistent effects are usually the safest choice.
12. Add Speaker Notes and Practise Your Presentation
Speaker notes allow you to prepare supporting details without putting everything on the slide.
To add notes, select a slide and enter your reminders in the Notes area beneath the workspace, where available.
Your notes might include:
- Additional explanations.
- Examples to mention.
- Questions to ask the audience.
- Important figures or facts.
- Transitions between topics.
Start the Slide Show
To present your slides, open the Slide Show tab and choose an option such as From Beginning or From Current Slide.
On many Windows desktop versions, F5 starts the slideshow from the beginning, while Shift + F5 starts from the current slide.
Practise speaking at a comfortable pace, avoid reading every word from the screen, and check that the content is visible on the display you will use.
If your version supports Presenter View, it may let you see speaker notes and upcoming slides while the audience sees the presentation.
13. Save, Share, and Export Your Presentation
Saving your work regularly helps prevent lost changes.
Save a PowerPoint File
- Select File → Save As when creating a new file.
- Choose a folder.
- Enter a meaningful filename.
- Save the presentation in PowerPoint Presentation format.
.pptx).
If you continue editing, use Ctrl + S on Windows to save changes.
Share Your Presentation
Depending on your account and storage setup, you may be able to share a presentation through OneDrive or an organisational SharePoint location. Review access permissions before sharing files containing confidential information.
You can also share a copy through a suitable file-sharing method.
Export as PDF
To create a version that is convenient for reading or printing, use File → Export or Save As, and choose PDF where supported.
A PDF is useful when recipients need to view the slides without editing them. However, some interactive features and animations may not work in the exported file.
14. Common PowerPoint Mistakes to Avoid
Too much text: Large paragraphs make slides difficult to scan. Focus on key points and provide supporting explanations verbally.
Inconsistent design: Changing fonts, colours, and layouts on every slide can make the presentation look disorganised.
Poor image quality: Blurry or stretched images reduce the overall quality of your slides.
Small text: Text that looks readable on your computer may be difficult to see on a projector.
Too many animations: Excessive effects distract from the information.
Missing sources: If you use external research, statistics, or images, provide appropriate attribution when required.
Not checking the final file: Review the slideshow from beginning to end and check for spelling mistakes, missing images, incorrect data, and awkward slide breaks.
No backup: Keep a copy of important presentations in a secure location, especially before a meeting or classroom session.
Frequently Asked Questions (FAQs)
1. Is Microsoft PowerPoint easy for beginners?
Yes. You can start with a blank presentation, add slides, insert text and pictures, and apply a theme. More advanced features can be learned gradually.
2. What is the default PowerPoint file format?
The standard PowerPoint presentation format is .pptx. Macro-enabled PowerPoint presentations use .pptm.
3. Can I use PowerPoint for free?
Availability depends on the product and account. PowerPoint for the web may be available with a free Microsoft account, while some desktop features require an eligible licence or subscription.
4. How many slides should a presentation contain?
There is no universal ideal number. Use enough slides to explain your topic clearly without overwhelming your audience. Consider the time available and the complexity of the subject.
5. Can I convert a PowerPoint presentation to PDF?
Yes. PowerPoint desktop and web versions generally offer PDF export or download options, although exact menus may differ. Review the exported file to confirm that its layout is correct.
Conclusion
Friends, in this post, we have gone through an amazing guide, “Microsoft PowerPoint for beginners“. With this practical application, you can easily convert your ideas and information into effective, clear visual presentations. If you learn to create slides, choose correct layouts, format text, insert visuals, and use transitions properly, you can soon develop effective presentations for business, education, and personal projects at ease.
You should first start making a presentation on a familiar topic. Then try to organise your information into a logical sequence, include relevant images, use readable text, and keep practicing regularly.
Once you get a good grip on the basics(Microsoft PowerPoint for beginners), gradually move to the advanced design features, charts, slide master, animations, and presenter tools to build some more engaging and fine presentations.
If you have any queries, you can write to us at support@a5theory.com; we will get back to you ASAP.
Hope! You will have enjoyed this post, “Microsoft PowerPoint for beginners“.
Please feel free to give your feedback in the comment section below.
Have a great time!