Hello Friends, In this blog post(How To Create A Starry Night Sky In Photoshop) we are going to let you know about another interesting Photoshop technique that is to create a starry night sky in Photoshop.
Sometimes when we need a background like the starry night sky in our image then we need to know this kind of Photoshop technique(How To Create A Starry Night Sky In Photoshop) to make this effect in our images.
Night sky with stars is a very common and popular scene in pictures and people use this type of effect in their images most often|How To Create A Starry Night Sky In Photoshop|
Wo within this blog post(How To Create A Starry Night Sky In Photoshop) we will let you know the full procedure step by step to build the starry night sky background inside our images.
This procedure(How To Create A Starry Night Sky In Photoshop) is very simple and if you want to develop it now then please follow the below-given step-by-step procedure for the same.
Very first open your image in the Photoshop window.
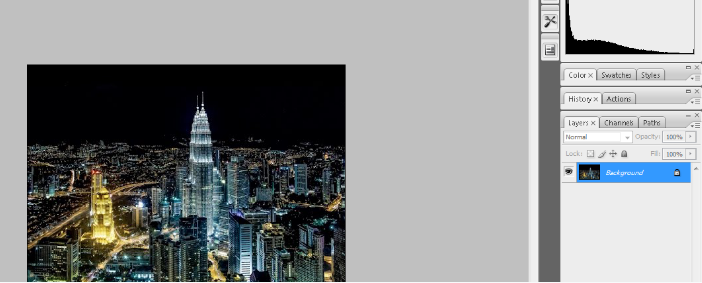
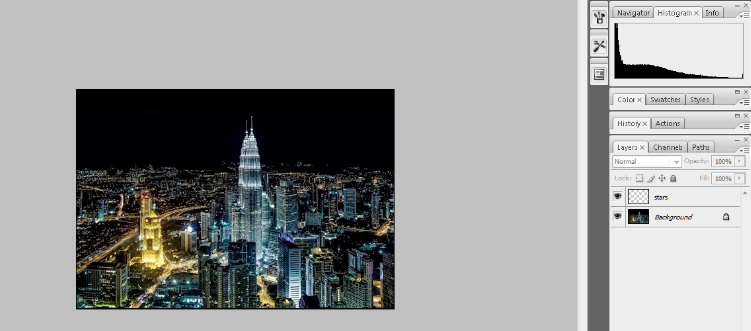
Then add a blank layer above the image layer or main layer.
To create a new layer just click on the option ‘Create a new layer bottom of the layer panel.
now rename this layer as stars.
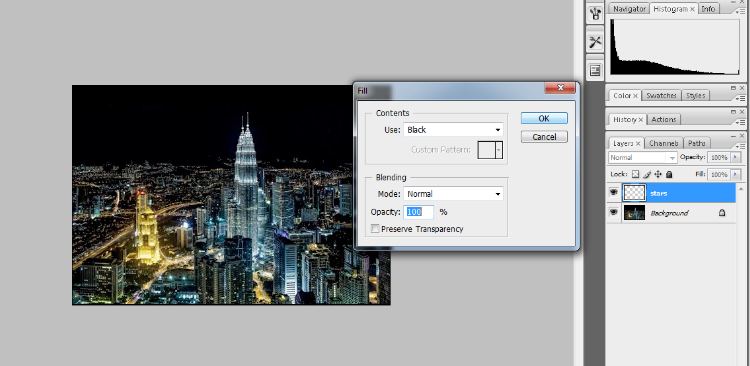
Fill the layer with black. Go to the menu and then click Edit->Fill and then select the black color.
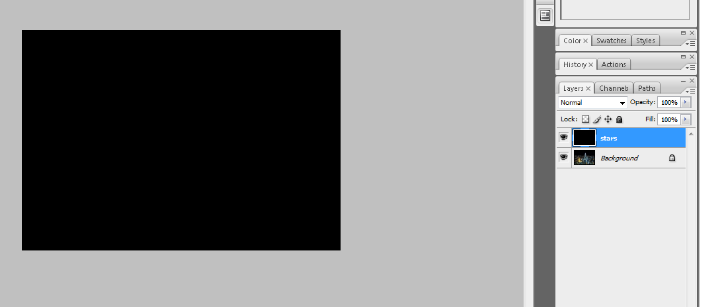
Now add some noise using the noise filter option. Go to the main menu and then click Filter->Noise-> Add noise.
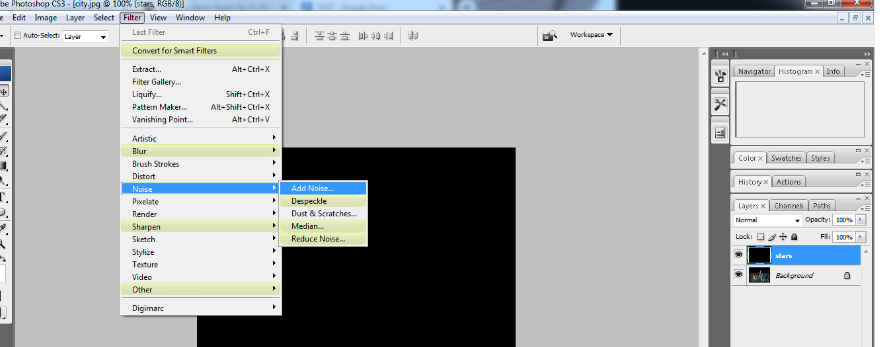
Now set the parameter as shown in the below image.
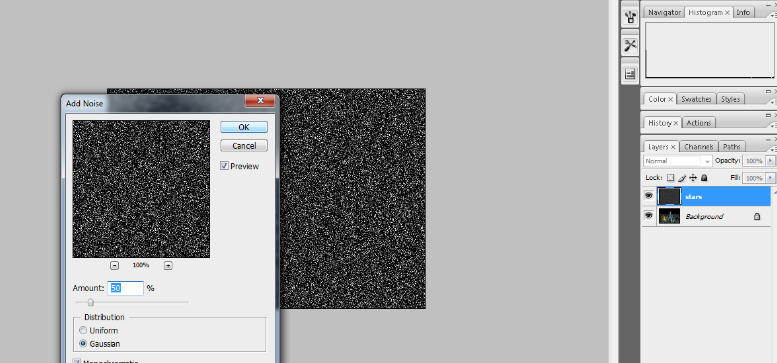
Now blur the noise with a Gaussian blur filter. Go to the main menu and then select Filter->Blur->Gaussian blur.
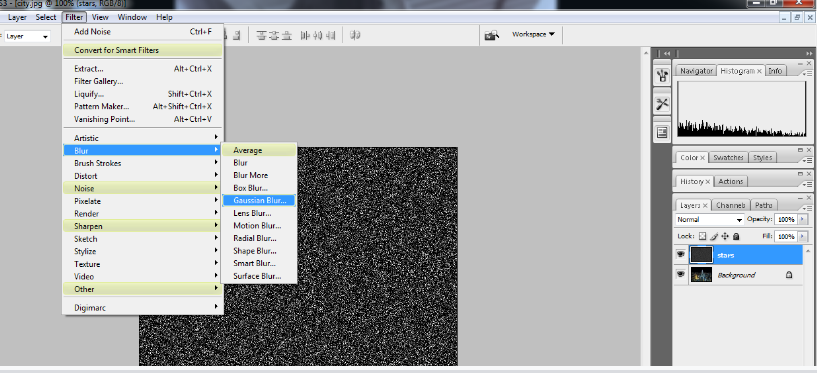
Now set the Gaussian blur parameter.
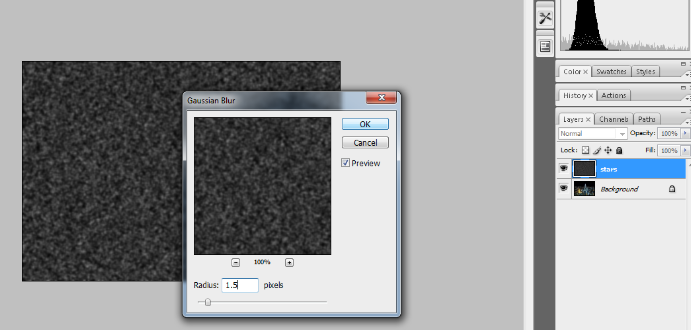
Now we need to turn this noise into the star using level image adjustment.
Go to the main menu and then click Image->Adjustment->level.
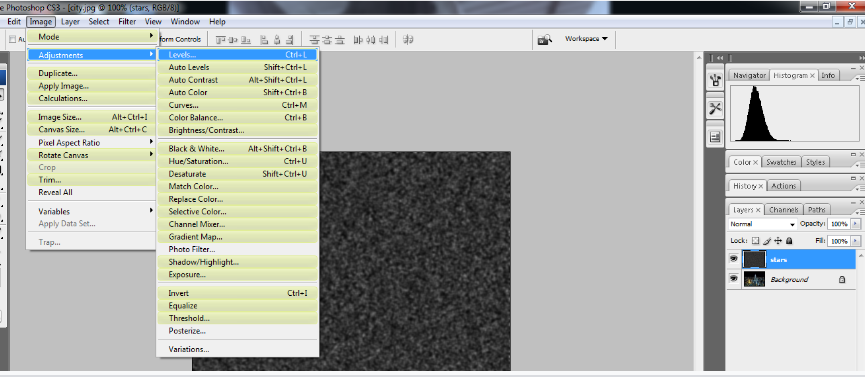
Now set the parameter for the levels.
You can test and try by setting different values for the white point slider and black point slider levels.
We have tried several combinations of black-and-white levels.
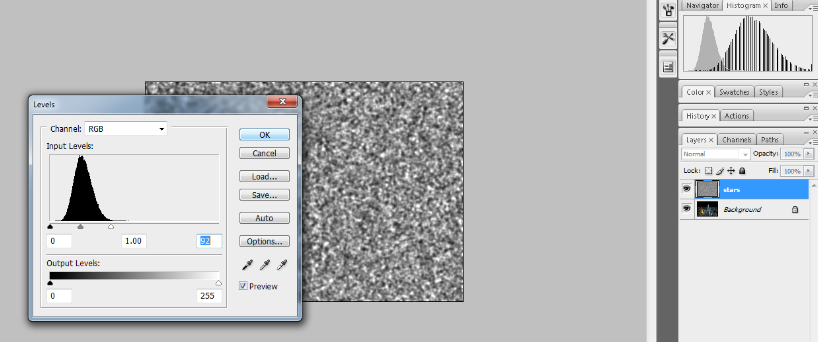
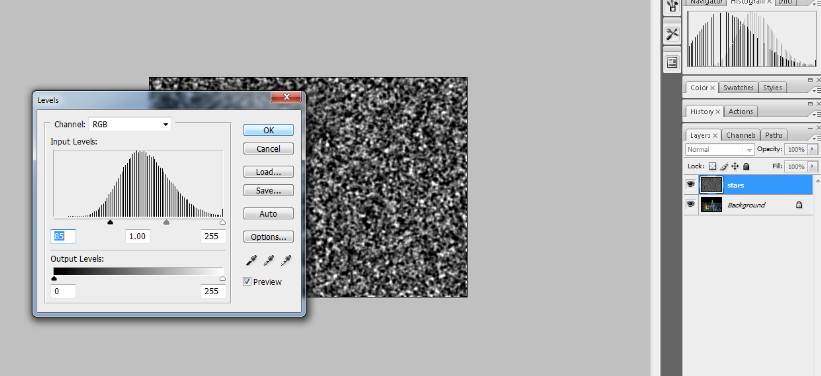
Finally, we came up with 94 as the white point slider and 90 as the black point slider values for our stars.
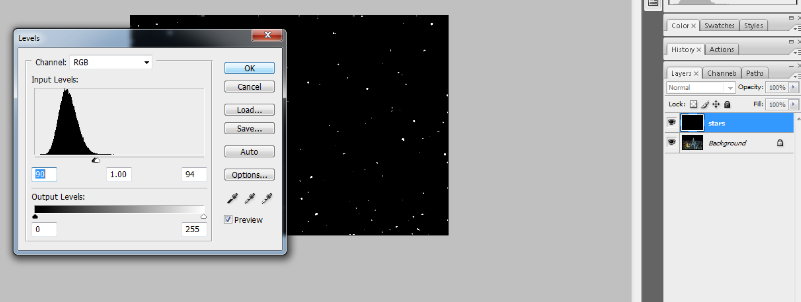
Now in the next step, we need to add the glow to our stars and for this glow.
We will create a copy of this layer of stars and then rename it as a glow layer.
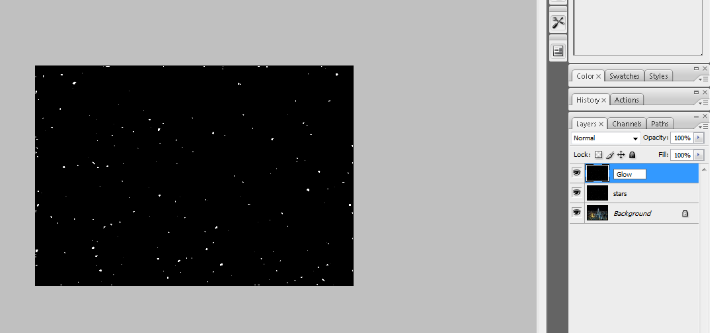
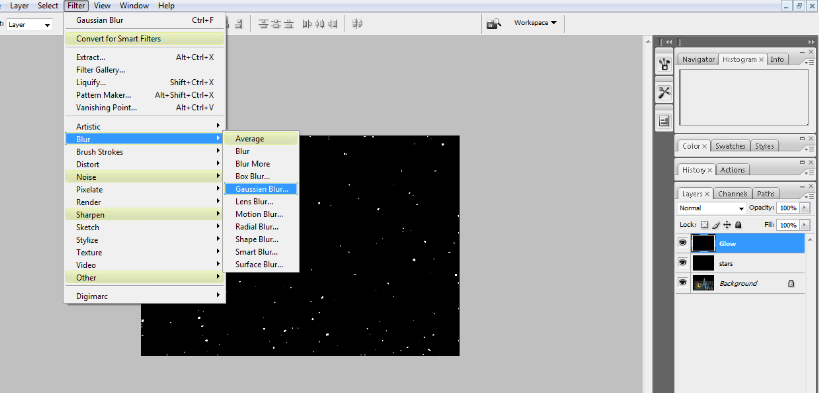
Now we need to add more blur using a Gaussian blur filter.
Go to the main menu and then click Filter->blur-> Gaussian blur.
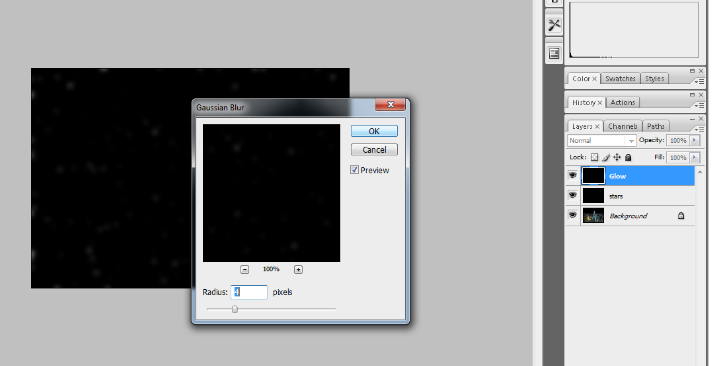
Now set the parameter for the Gaussian filter as we set the radius as 4 pixels here.
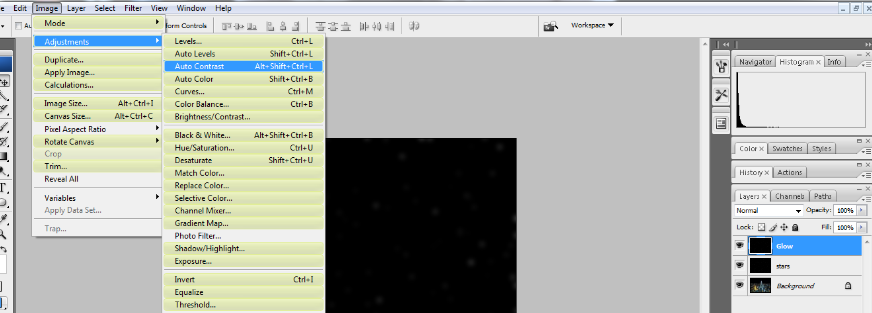
And now we brighten the stars with the auto-contrast option inside the image tab.
Go to the main menu and then click Image->Adjustment->auto contrast.
Now lower the opacity of the glow layer and make 25%. See the below image for the same.
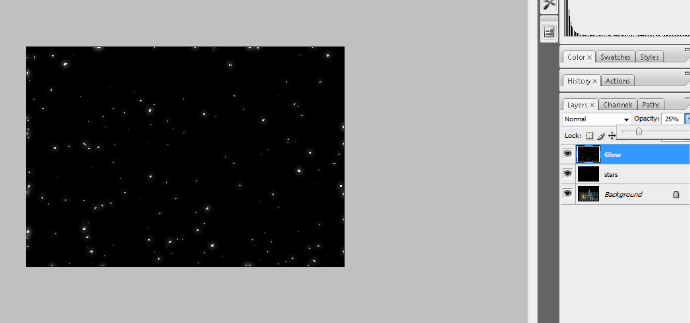
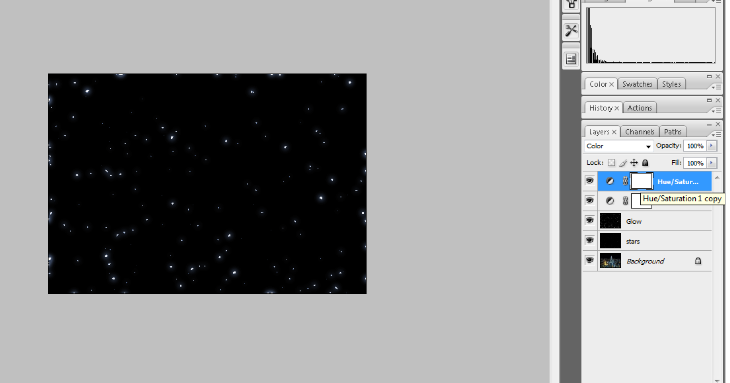
Now we need to add color to the stars. For adding the color just use the hue/saturation option.
Please see the below image for the same.
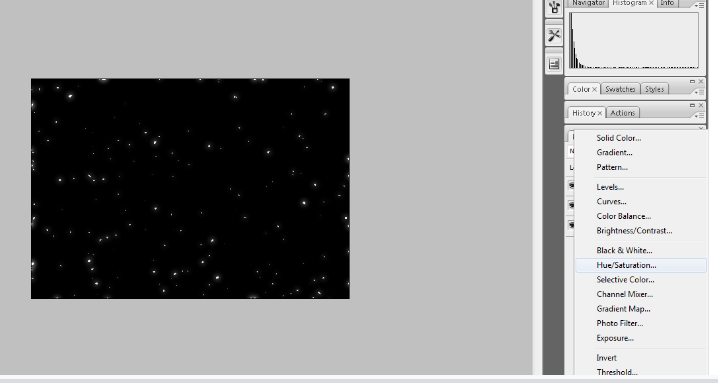
Set the hue/saturation parameters as shown in the below image.
And change the blend mode to color as shown in the below image. Here our stars change blue.
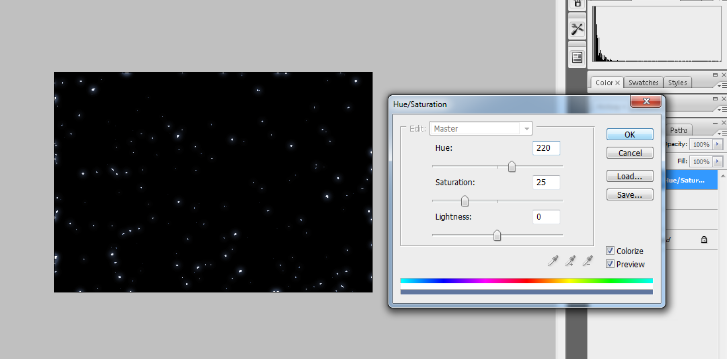
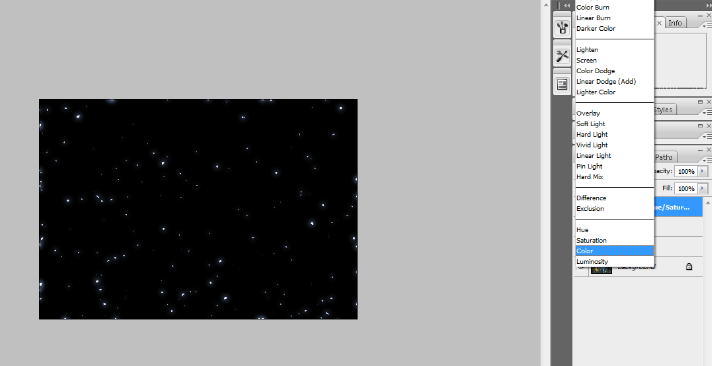
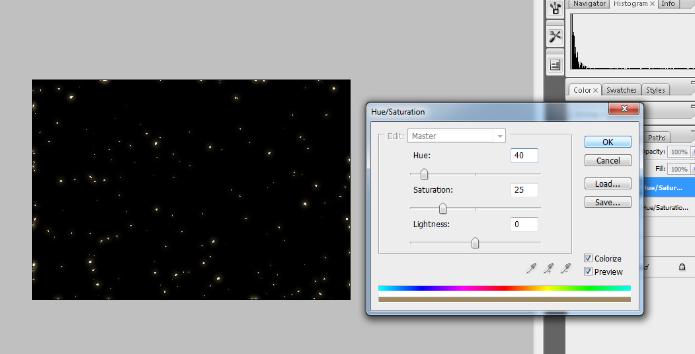
Now make a copy of this hue/saturation layer and then again update the value and make it 40 as shown in the below image.
And here blend mode will automatically change as color. And now we see that our stars have turned orange.
Now we apply the cloud filter to the layer mask.
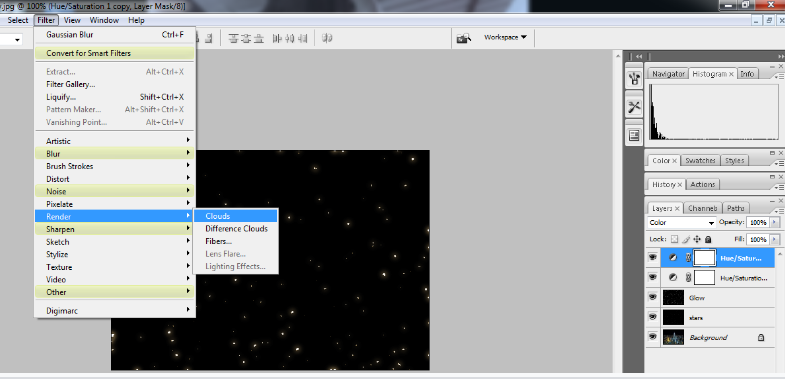
Make sure you click on the layer mask and then make white your foreground color. Now click Filter->Render-Clouds.
As we apply this filter then we have a mixed range of blue and orange stars in the pictures.
See the below image for the same.
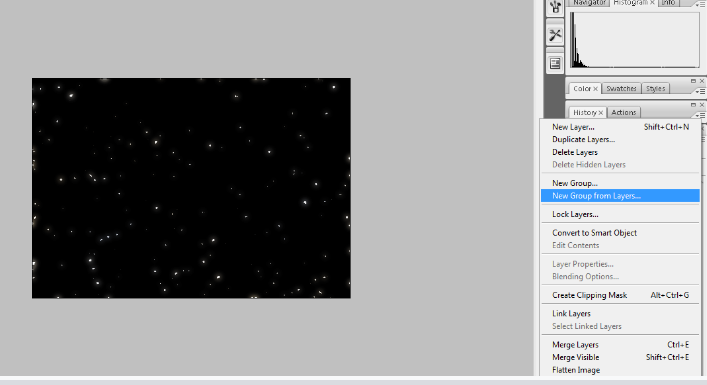
Now we group all the star’s effects into a single group. For this first select all the star’s layers.
For this hold the shift key and then click on the stars layer.
Now all the layers have been selected and now click on the menu option at the corner of the layer panel and then select the option ‘New group from layers’.
And now rename it as stars. And now set the blend mode as lighten or screen.
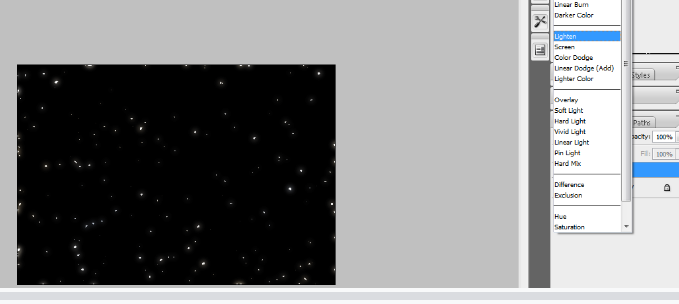
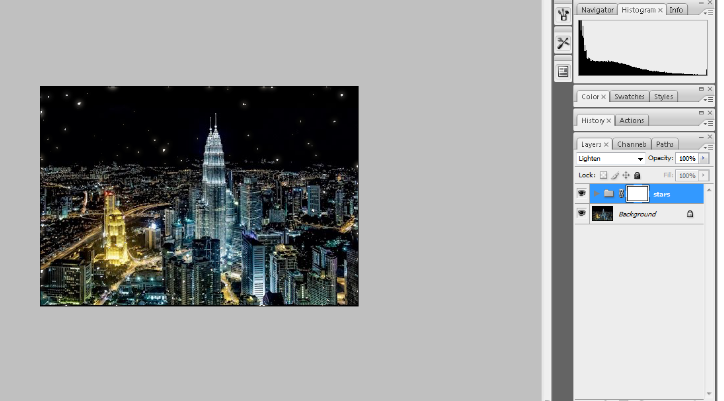
Now we add the layer mask to the stars group. And then select the foreground as black color.
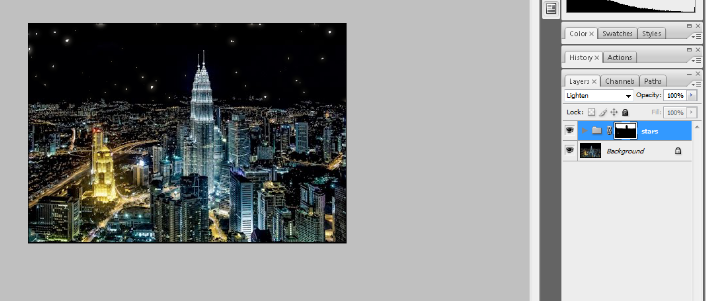
Select the brush and now clear all the stars wherever it is not needed in your image.
See the below image for the same.
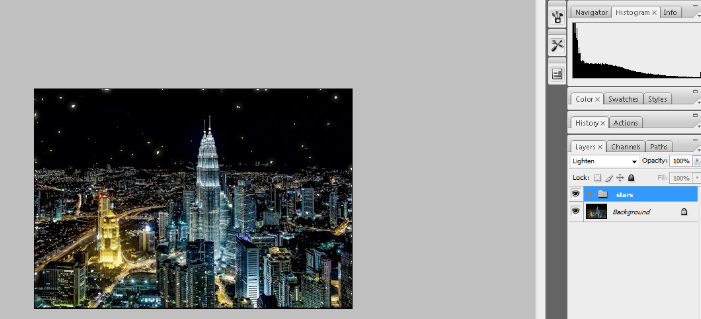
Now we have finally got our image ready for use.
Now you can see the starry night sky effect in our image which was missing in our new image or initial image.
You can also go through a few more blog links below related to Photoshop:
How do I quickly remove a tree background in Photoshop In Hindi…
How to Add Falling Snow to Your Photos with Photoshop…
How To Create A Starry Night Sky In Photoshop…
How to Turn A Photo Into A Collage With Photoshop In Hindi…
How to Add a Border to a Photo with Photoshop In Hindi…
How to Turn A Photo Into A Collage With Photoshop…
How to crop a circular image in Photoshop in Hindi…
Retro 3D Text with Photoshop in Hindi…
clipping mask in Photoshop in Hindi…
Conclusion:
So friends, In this blog post(How To Create A Starry Night Sky In Photoshop) we have learned an amazing Photoshop functionality to build the starry night sky effect inside our image. This is very exciting to add such a starry night sky effect to our older images. This adds extra value to our photo and changes the beauty of our image. Here to build this Photoshop functionality we mainly use Filters(Noise and Gaussian filters), Image adjustment properties, and hue-saturation effects. Hope you would like this blog post and find it useful and knowledgeable for you.
In the case of any queries, you can write to us at a5theorys@gmail.com we will get back to you ASAP.
Hope! you would have enjoyed this post about How To Create A Starry Night Sky In Photoshop.
Please feel free to give your important feedback in the comment section below.
Have a great time!
