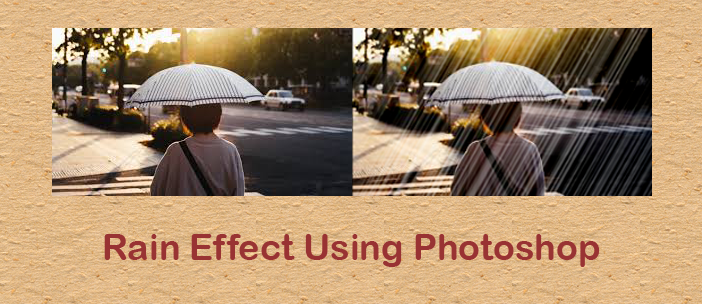
Hello Friends, In this blog post(How To Add Rain Effect In A Photo Using Photoshop) I am going to let you know about a very interesting functionality in Photoshop.
That is how to add rain effects in a photo using Photoshop. If you have a normal picture and you want to show a raining effect in the same picture then this tutorial can be helpful for you|How To Add Rain Effect In A Photo Using Photoshop|
In this blog post(How To Add Rain Effect In A Photo Using Photoshop), we will explore How to add a rain effect in Photoshop. How do you add rain in Photoshop? How do you animate rain in Photoshop? How do you paint rain in Photoshop?
To show this rain effect we are using Photoshop version 10.0.
To show the rain effect in your picture using Photoshop you just need to follow the below-given procedure step by step.
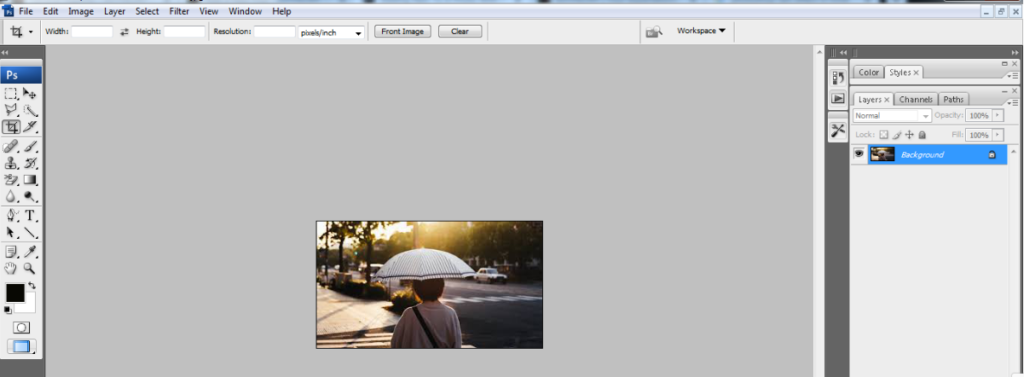
This would be your first step to opening your image with Photoshop. This would be your background image by default. See the below image for the same.
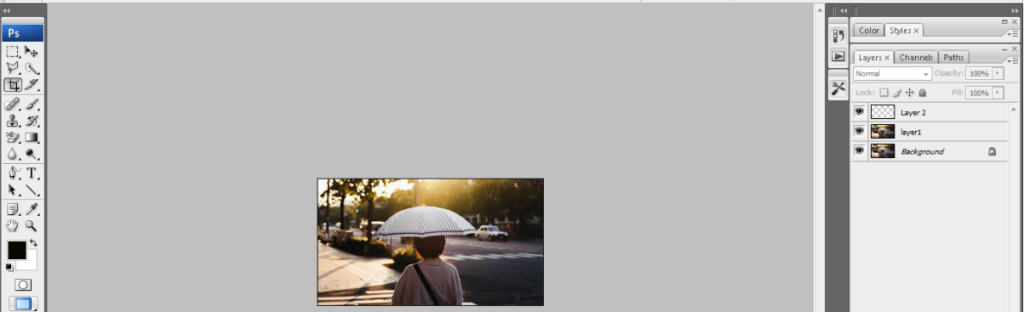
Make a duplicate image of your background image. Just right-click on your background image and select the option duplicate layer. And rename it with Layer1 or you can name it as per your requirement.
You can also do this with the help of the menu bar at the top.
Just go to the Layer select the duplicate layer and rename it with Layer1. See the below image for the same action.
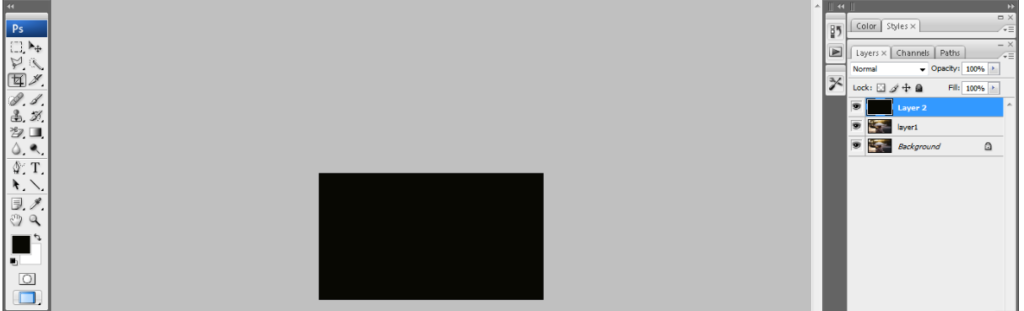
Once you make this duplicate layer then make sure to set the foreground color as black and the background color as white as you can see at the bottom left in the below-given image.

In this step just create one new layer Layer->New->Layer. And rename it as layer 2. See the below image for the same.
Now set layer 2 colors as black, for this, you can directly use the short key Alt+Back space, or you can directly set its color to black by selecting the color from the toolbar at the bottom right.
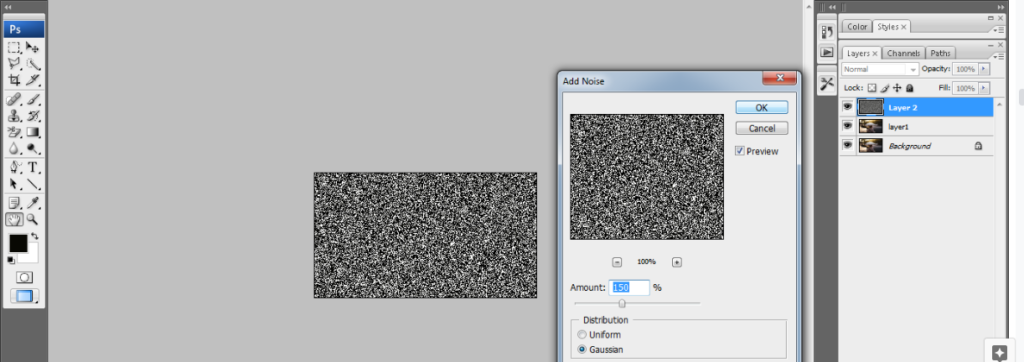
Now, add noise to layer 2, go to the menubar, and select Filter->Noise-> to add noise.
Set the amount to 150 and check the radio option Gaussian as shown in the below image.
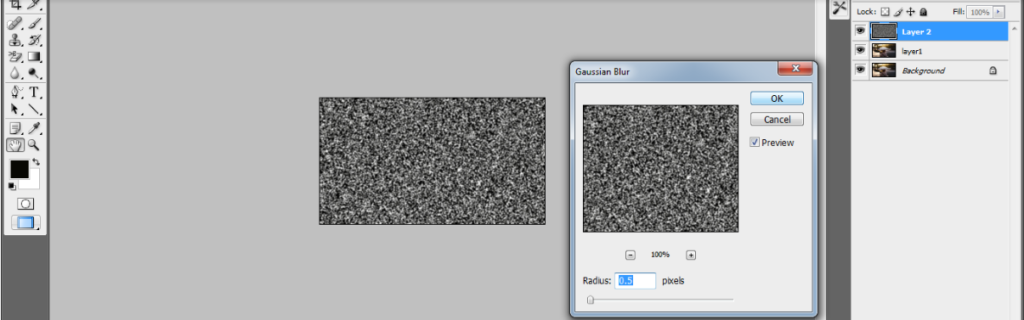
Now go to the menu bar and select Filter->Blur->Gaussian blur. And set the radius to 0.5 pixels as shown in the below-given image.
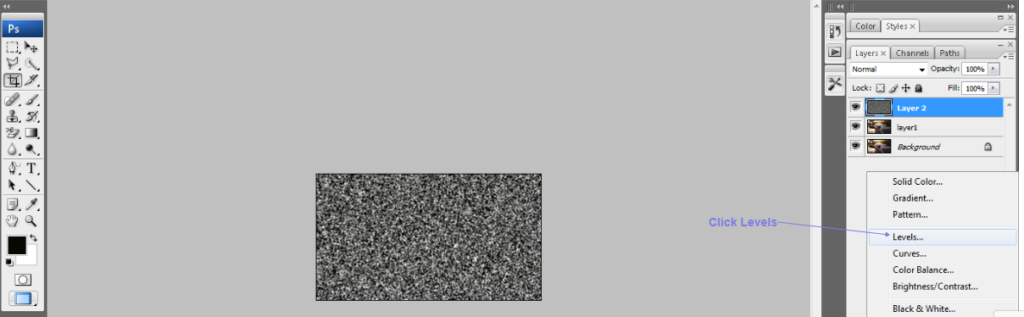
Now click on the adjustment layer option and then click on the level as shown in the below image.
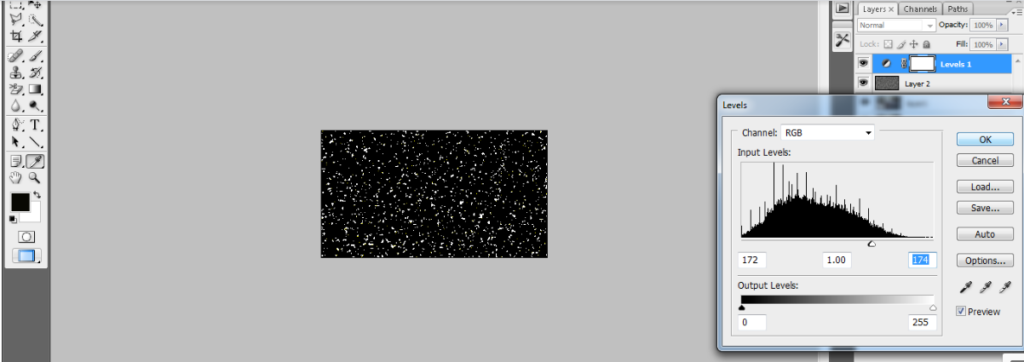
Here, we just need to set the input level and output level by dragging the black and white arrow pointer.
In this case, we kept the input level as (172, 1.0, 174 ) and the output level as (0 255). You should worry about the grey pointer as it automatically moves on the movement of the black and white pointer.
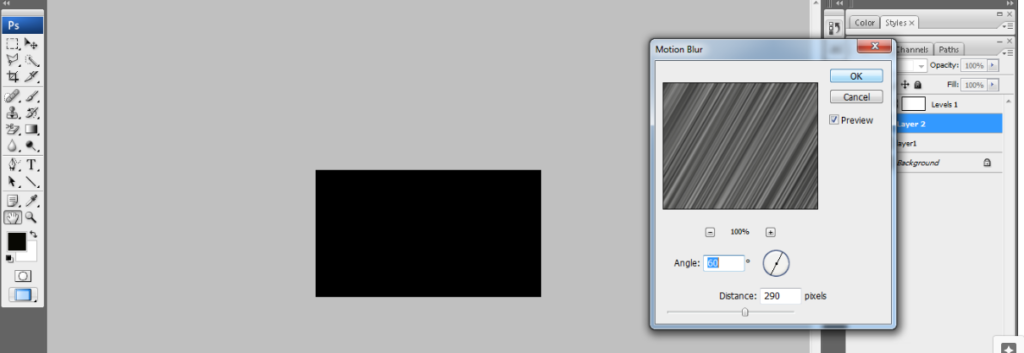
Now, with the selection at layer 2, we would select Filter->Blur->Motion Blur. See the below image for the same.
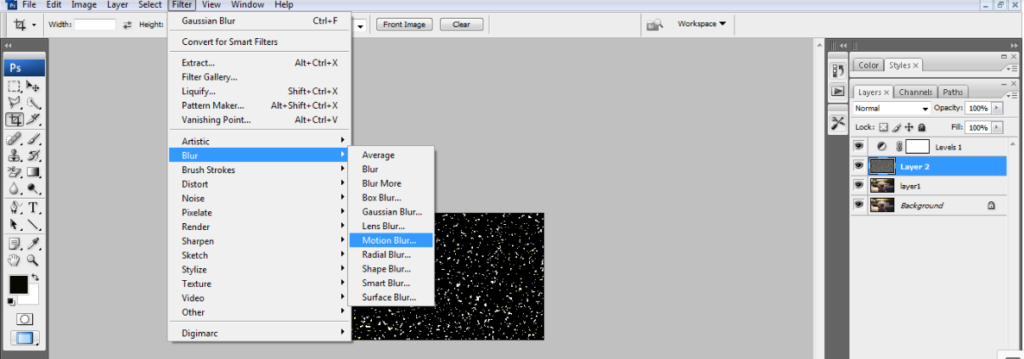
Once you click the motion-blur option you get a window of it as shown below.
Set an angle of 60 degrees and a distance of 290 pixels. See the below image for the same.
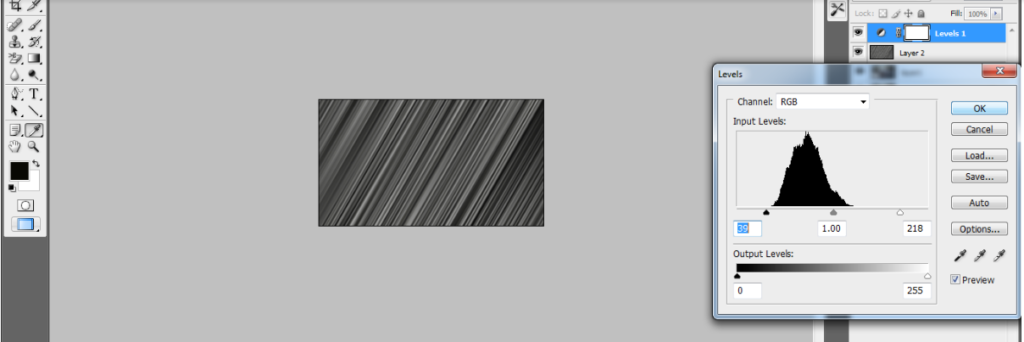
After setting the motion blur you see a black screen, so to see the motion blur effect we need to again set the level.
Now, go to your level thumbnail option at layer 2 (you can see the selection in the below image), and adjust your level again as input level(39, 1, 218) and output level (0, 255).
Here you can see the motion blur effect in the image.
Still, we are unable to see the image with the rain effect.
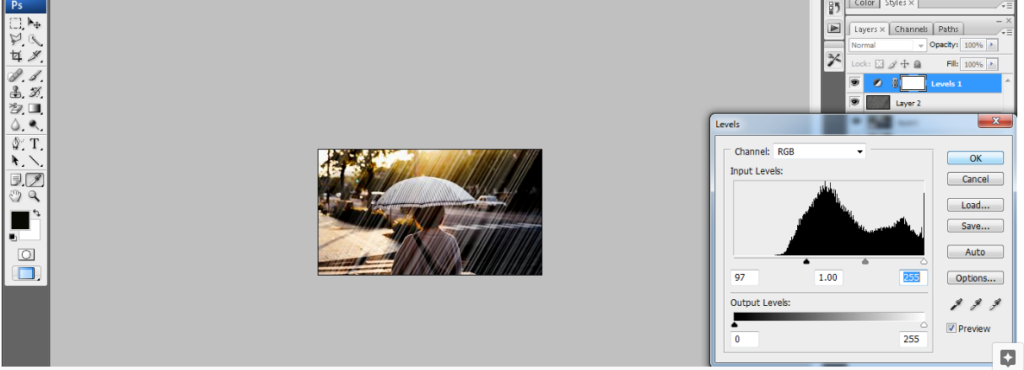
To see the rain effect in the image you just keep the selection at layer 2 and select the blend mode as SCREEN as shown in the below-given image. Now your image will be visible with a rain effect.

If you want to change the current effect, you can adjust the value using motion blur and change the levels as per your requirement.
We have made a little change in levels and got the below-given image with some different effects.
Now, you get your desired image with a rain effect using Photoshop.
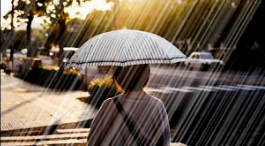
You can save your image and can use it wherever you need this. See the final image given below.
You can also go through a few more blog links below related to Photoshop:
How do I quickly remove a tree background in Photoshop In Hindi…
How to Add Falling Snow to Your Photos with Photoshop…
How To Create A Starry Night Sky In Photoshop…
How to Turn A Photo Into A Collage With Photoshop In Hindi…
How to Add a Border to a Photo with Photoshop In Hindi…
How to Turn A Photo Into A Collage With Photoshop…
How to crop a circular image in Photoshop in Hindi…
Retro 3D Text with Photoshop in Hindi…
clipping mask in Photoshop in Hindi…
How To Apply Layer Mask In Photoshop In Hindi…
Conclusion:
In this blog post(How To Add Rain Effect In A Photo Using Photoshop), we have gone through How to add rain effects in Photoshop. How do you add rain in Photoshop? How do you animate rain in Photoshop? How do you paint rain in Photoshop?
In the case of any queries, you can write to us at a5theorys@gmail.com we will get back to you ASAP.
Hope! you would have enjoyed this post about ‘How to add rain to a photo in Photoshop ‘.
Please feel free to give your important feedback in the comment section below.
Have a great time! Sayonara!