Hello Friends, In this blog post(How To Create Flaming Hot Fire Text in Photoshop) we are going to let you know about creating the flaming fire effect in Photoshop. Such text looks great wherever you use it and is very useful for an enthusiastic poster or picture and campaign.
Within this blog post(How To Create Flaming Hot Fire Text in Photoshop), we will explore the answer to a few important questions related to Flaming Hot Fire text in Photoshop like How do you give text fire in Photoshop? How do you use flames in Photoshop? How do you make a fire effect? How do I make fire glow in Photoshop? How do you make a burning text? How do you edit fire in Photoshop?
If you want to make such flaming fire text using Photoshop then you just follow the below-given procedure step by step which is very simple. Here we will dictate your point-to-point |How To Create Flaming Hot Fire Text in Photoshop|
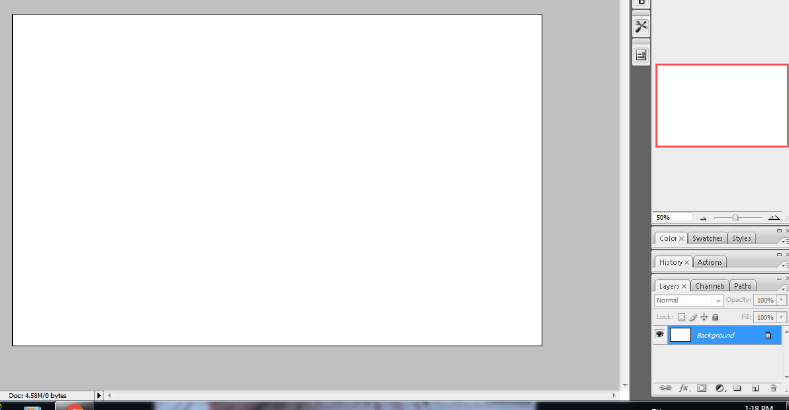
Create a new Photoshop document (width 1600 pixels, height 1000 pixels, and resolution 72 pixels).
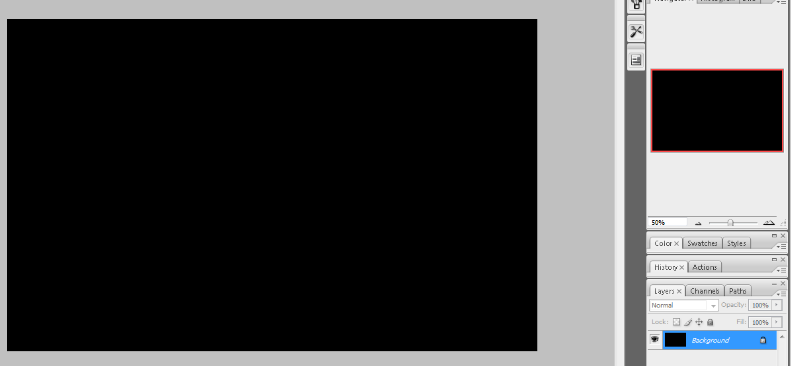
Fill this new document with the black color. Edit->Fill and then select black color and press ok.
Now we add the text in this window(Times New Roman, bold, 72pt) to make this text white color.
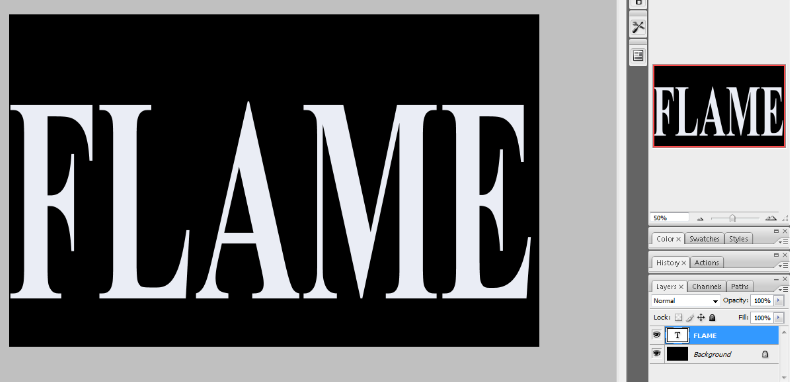
Now select the free transform option(Edit->free transform) and then resize this text into the full screen from all sides. See the above image for the same.
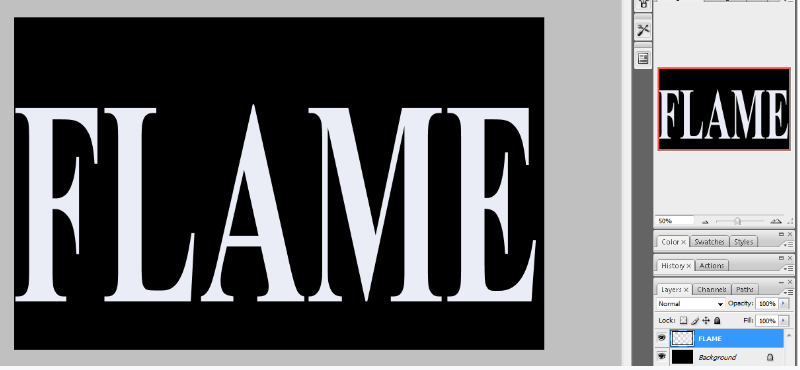
Now we need to add flame in our text, so to do this first we need to rasterize our text, we need to select the text and then right-click, and then you can find the option for rasterizing and click over it and your text will be rasterized as shown in the below image.
Now make the duplicate layer of the text(Flame) layer.
To do this just make right-click on the text layer and then select the option for a duplicate layer. See the image below for the same.
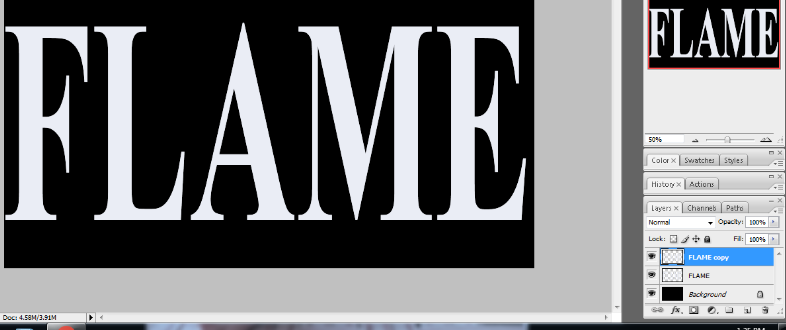
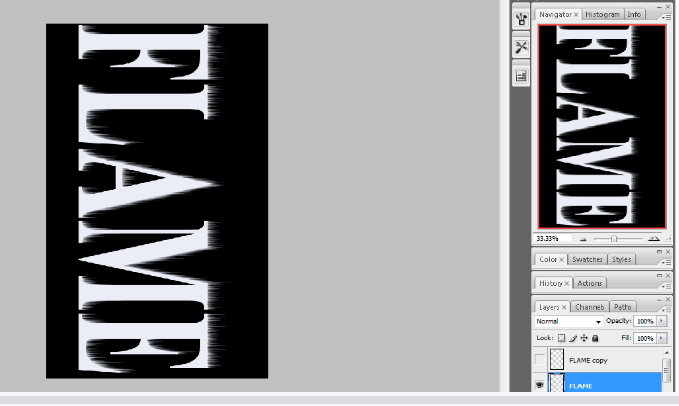
Now select the original text(Flame) layer and then rotate it 90 degrees clockwise. See the below image for the same.
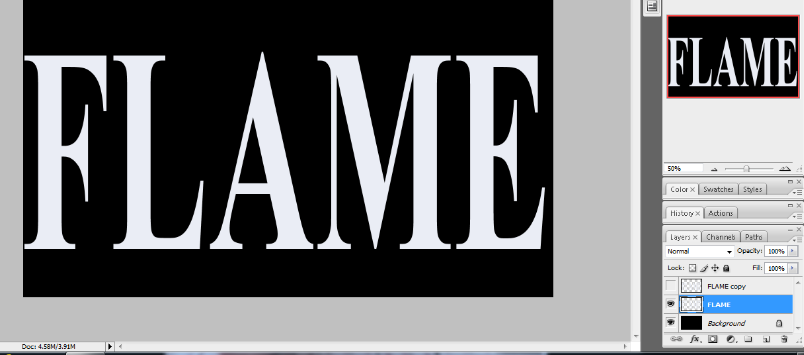
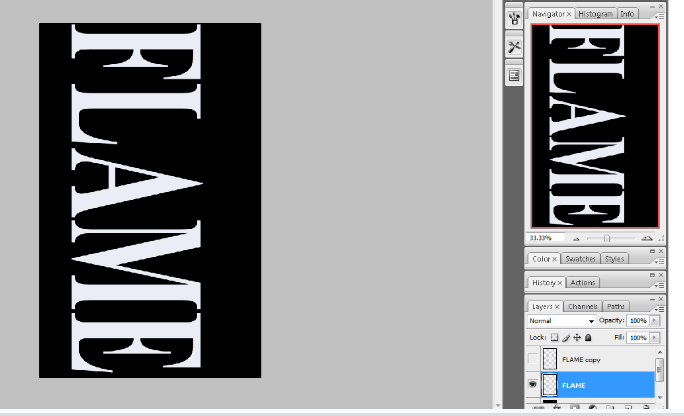
Now we need to apply a wind filter over this text.
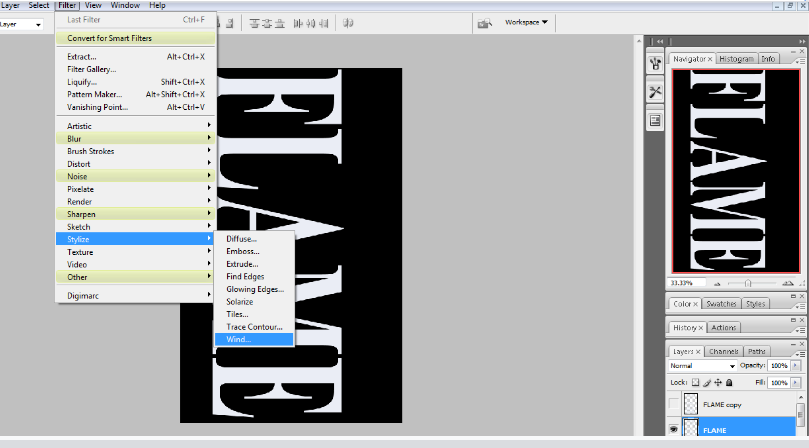
To do this go to the filter and then click on Stylize and then select the wind and then select the…
… wind from the left option in the wind filter screen and repeat this action three times.
see the below image for the same.
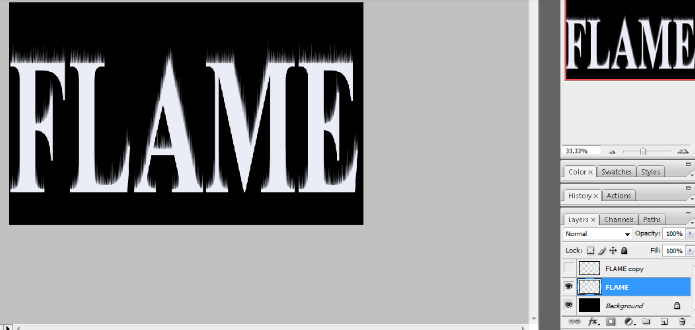
Now again move your image 90 degrees counterclockwise. See the below image for the same.
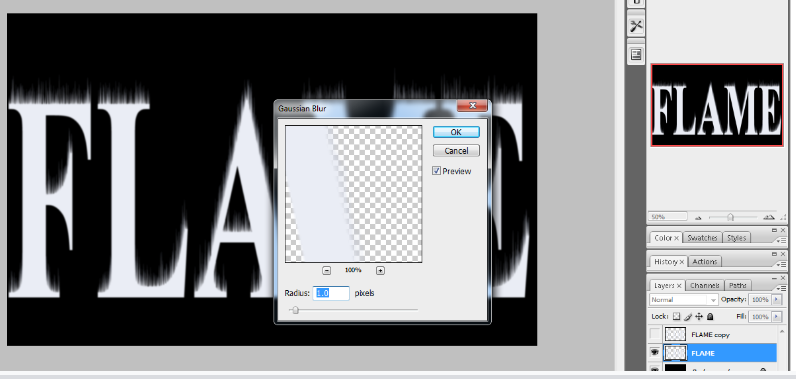
Now again apply the Gaussian blur filter to the text. go to filter->blur-> Gaussian blur and then in the Gaussian blur filter select the radius 1.0 and click ok.
This will provide a softer look to the flame.
Now make a duplicate copy of the background layer.
Just select the background layer right-click over it and then select the option for duplicate image.
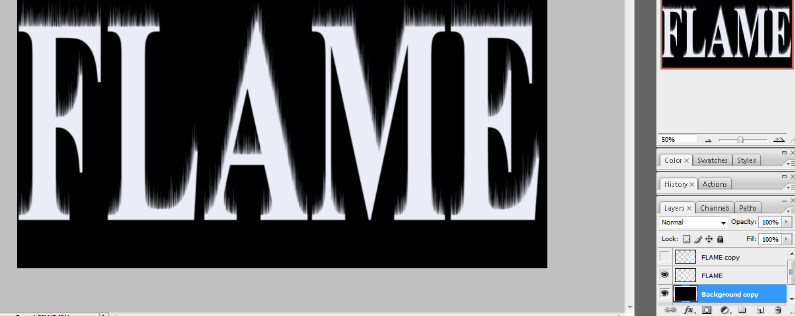
Now merge the text(Flame) with a background copy image. right-click on the text image then select the merge down option. See the below image for the same.
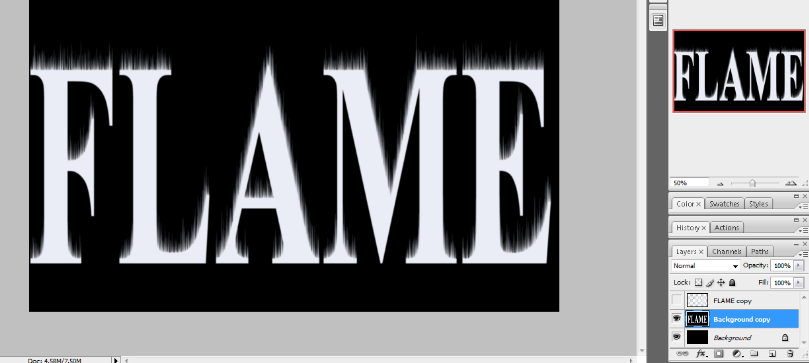
Now rename the merged image as flames. And now draw the flames with liquify filter.
Set the brush size to 100, pressure to 100, and density to 50, and now draw the flames to all the sides of the text.
Now draw the small medium and large size flames by changing the brush size to 20, 50, and 70 respectively.
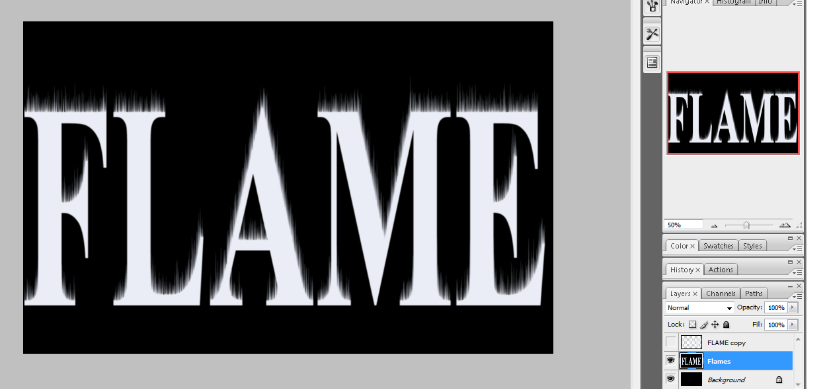
Now we need to color the flames. To do this add two hue/saturation layers to this merged text layer(Flames).
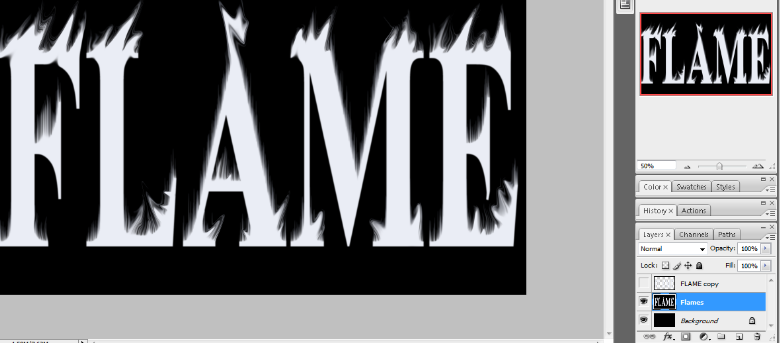
Add the first hue/saturation adjustment layer.
To do this just select the layer flames and then click on the fill or adjustment layer option below in the panel and then select the Hue/Saturation option.
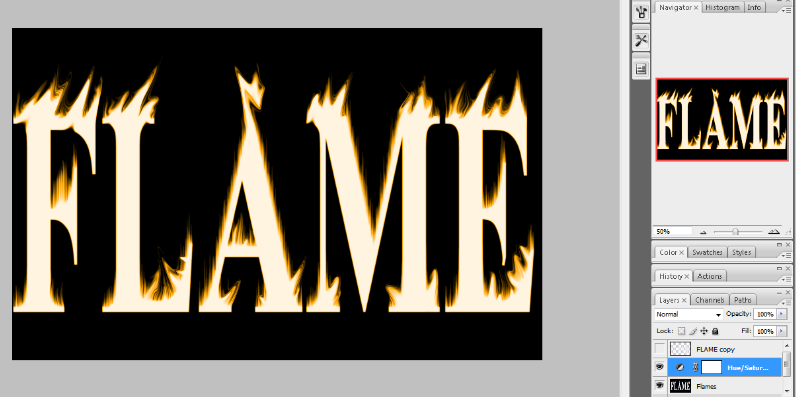
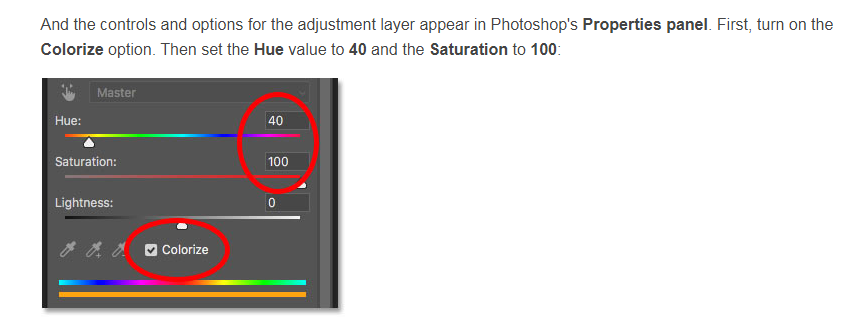
Add the second hue/saturation adjustment layer.
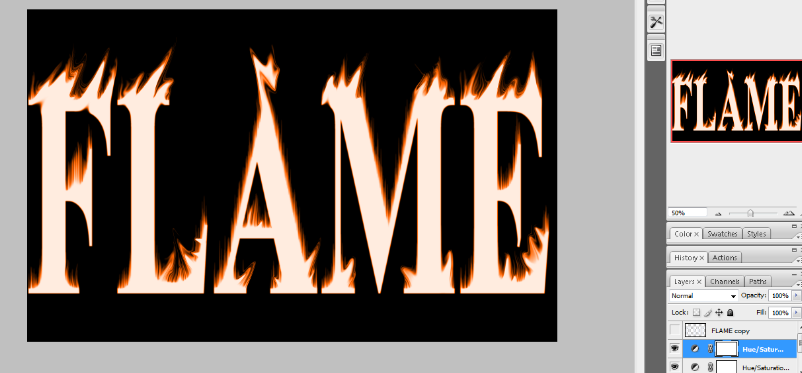

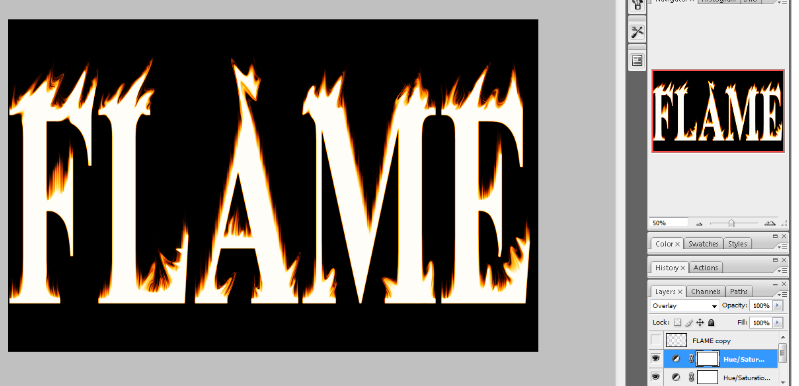
Change the blend mode to the overlay.
Add the level adjustment above the flames layer.
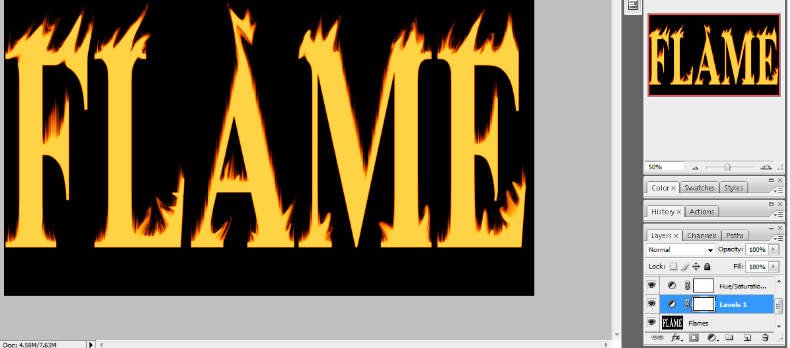
Lower the max brightness output level.
Now we have to color the text, and first turn on the top layer that we have made turned off in the starting.
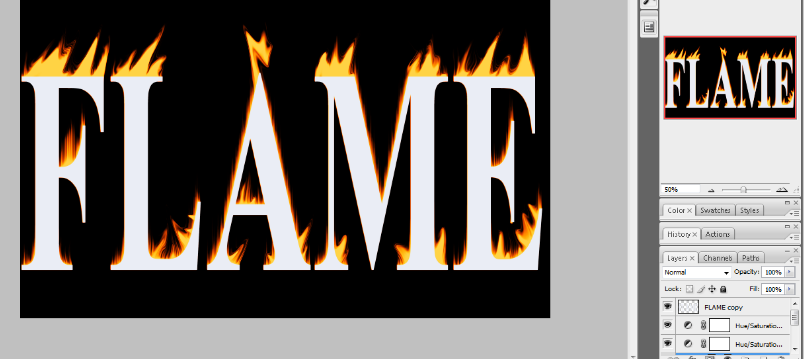
Rename the layer text. and then add the gradient overlay effect to it.
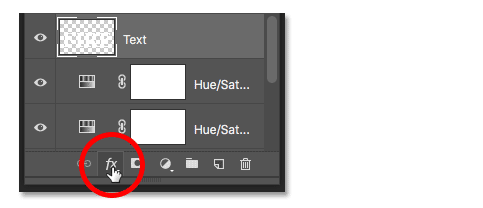
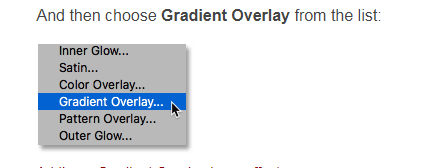
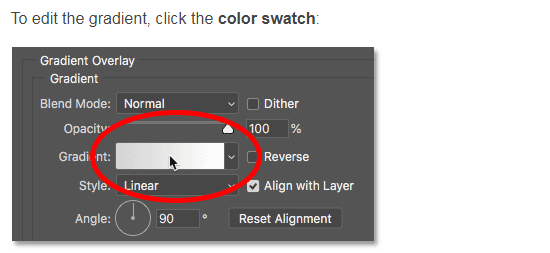

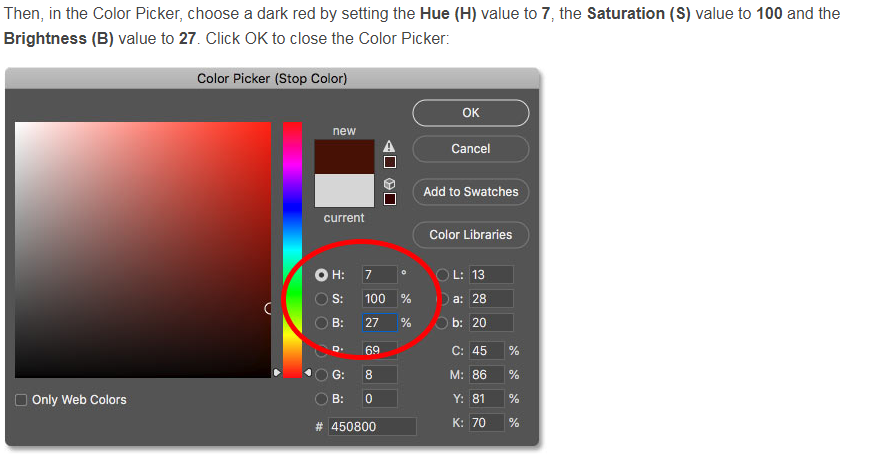

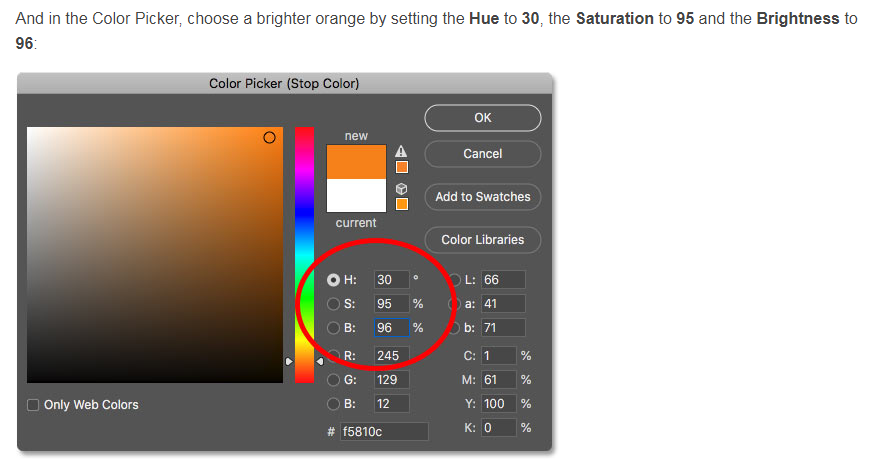
Click ok to close the color picker, and then click OK to click the gradient editor, but leave the layer style dialog box open.
The text is now colored with a gradient.

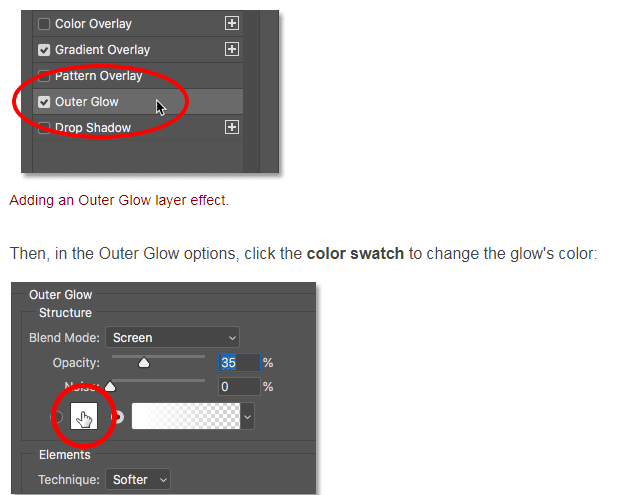
Add an outer glow layer.
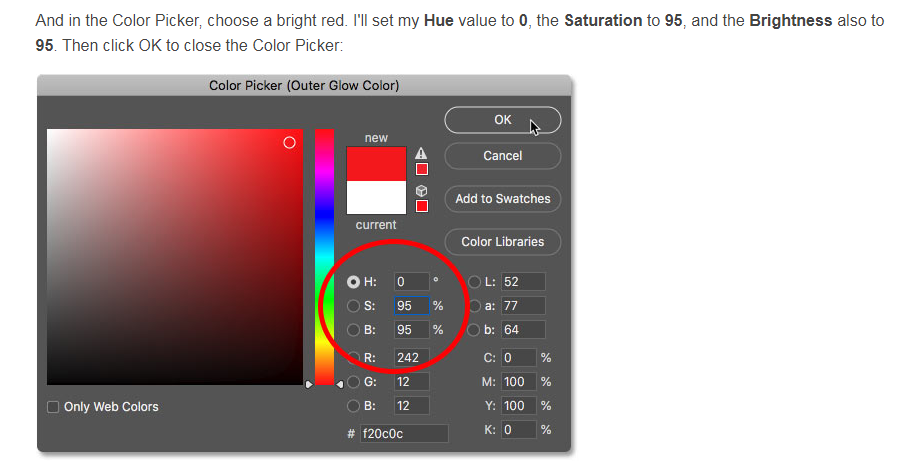
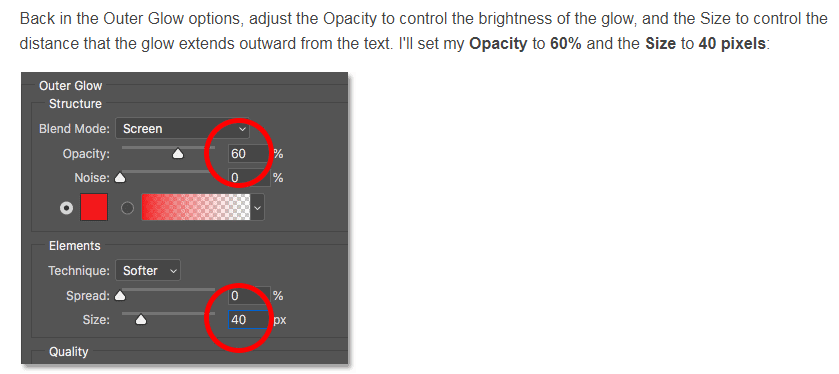
Here’s the effect with the red glow applied around the letters:

Add an inner flow layer.
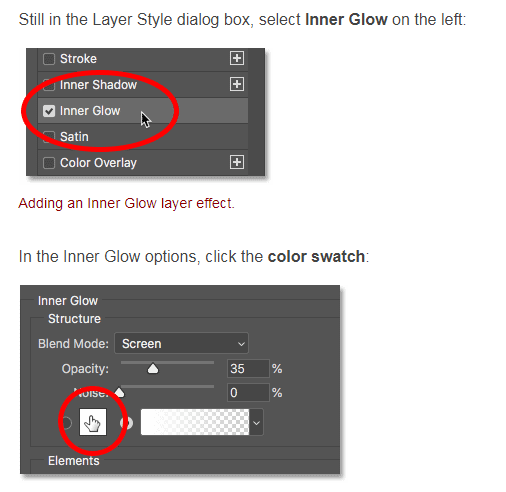
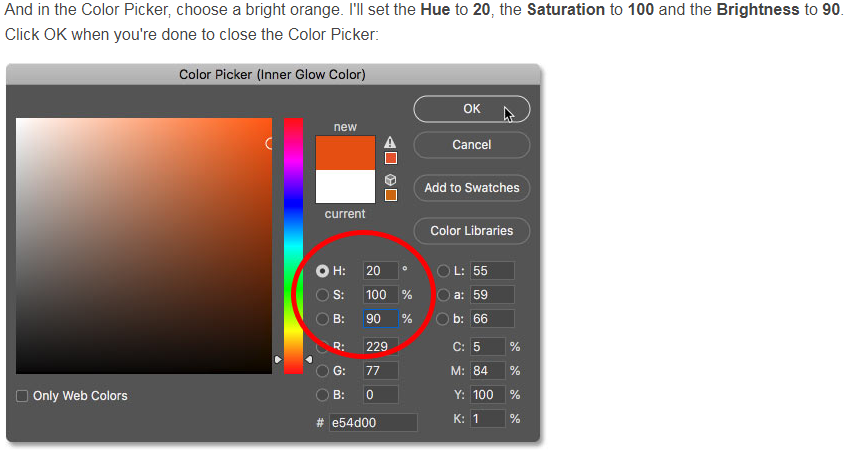
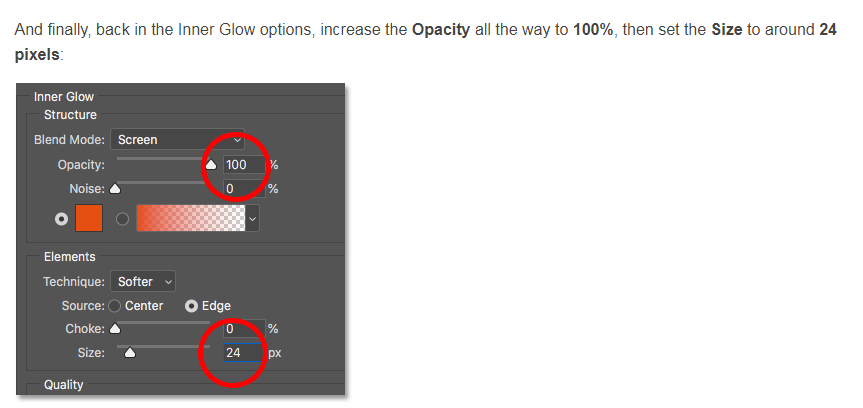
We are done with our layer styles, so click OK to close the layer style dialog box. Here’s the result with all three layer effects applied to the text.

You can also go through a few more blog links below related to Photoshop:
How do I quickly remove a tree background in Photoshop In Hindi…
How to Add Falling Snow to Your Photos with Photoshop…
How To Create A Starry Night Sky In Photoshop…
How to Turn A Photo Into A Collage With Photoshop In Hindi…
How to Add a Border to a Photo with Photoshop In Hindi…
How to Turn A Photo Into A Collage With Photoshop…
How to crop a circular image in Photoshop in Hindi…
Retro 3D Text with Photoshop in Hindi…
clipping mask in Photoshop in Hindi…
How To Apply Layer Mask In Photoshop In Hindi…
Conclusion:
So here in this blog post(How To Create Flaming Hot Fire Text in Photoshop), we have learned a very interesting Photoshop technique to create flaming fire text in Photoshop. You can also update this color by updating the gradient properties and coloring effect and can easily change the color of text and flame. Within this blog post, we have gone through How do you give text fire in Photoshop, How do you use flames in Photoshop, How do you make a fire effect, How do I make fire glow in Photoshop, How do you make a burning text, How do you edit fire in Photoshop,
In the case of any queries, you can write to us at a5theorys@gmail.com we will get back to you ASAP.
Hope! you would have enjoyed this post about How To Create Flaming Hot Fire Text in Photoshop.
Please feel free to give your important feedback in the comment section below.
Have a great time!

Thank you, your article surprised me, there is such an excellent point of view. Thank you for sharing, I learned a lot.
Thanks for sharing. I read many of your blog posts, cool, your blog is very good.