How is this possible using postmark SMTP?| How to send 25000 emails for free of cost using Postmark SMTP
Yes, this is possible as PostMark SMTP allows you to send 250000 emails free of cost. you can either send the emails from Postmark or you can use their SMTP relay service and send the emails using another email client.How much do we need to pay as we cross this free quota using postmark SMTP?
After you cross the free email sending quota you just need to pay $0.25/1000 emails which is quite cheap.
What is the procedure to get the benefit of this free service using postmark SMTP?
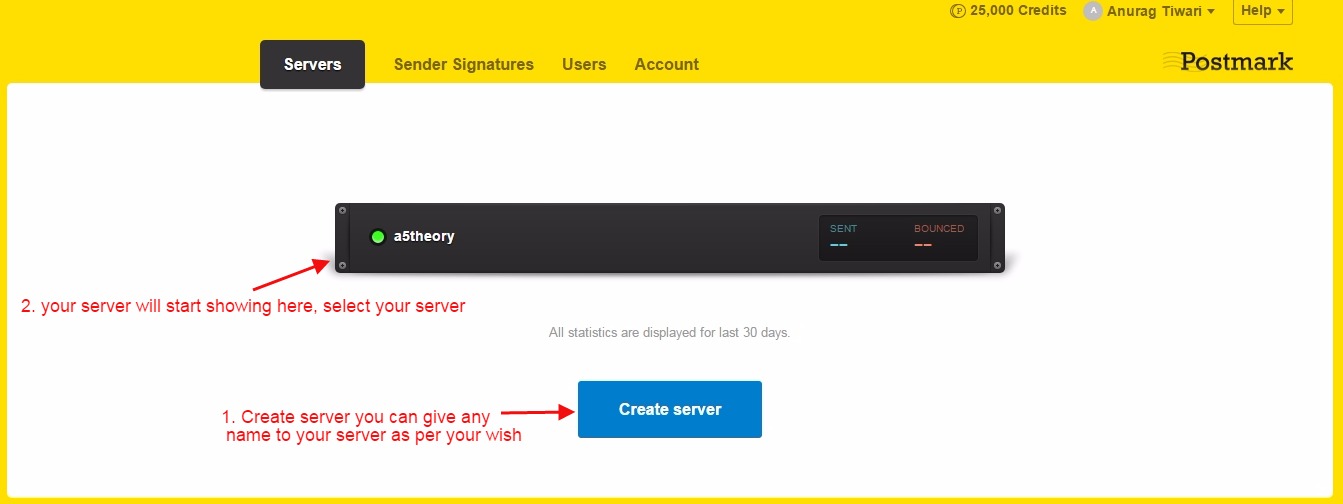
It is a very simple process(How to send 25000 emails for free of cost using Postmark SMTP), just follow the step-by-step procedure given below.1. Sign up for the PostMark SMTP account if you have not created it yet. 2. create a server for sending your emails, this is setting your account with the API tokens and other records.Here you can provide any name related to your email campaign or domain you are using.
 3. Verify your domain:For sending an email using PostMark SMTP you need to verify your domain address, for this, you just need to add the SPF and DKIM records to your domain hosting sitewhere you have purchased your domain.
How to Get SPF and DKIM from PostMark SMTP?
Follow the below procedure for getting the SPF and DKIM.
Enter your domain address which you want to be verified. See the image below. After entering the domain just click on the Verify Domain button as shown in the image below.

Now, that you have the SPF and DKIM records, you have to add these records to your domain hosting site.say, you have purchased your domain from Godaddy then follow the below procedure to add the SPF and DKIM.


This procedure is quite similar to all the domain hosting sites.Login to your domain hosting site where have you purchased your domain for example login to Godaddy if you have purchased your- domain from Godaddy.

Click on Manage.

Click on Manage DNS.

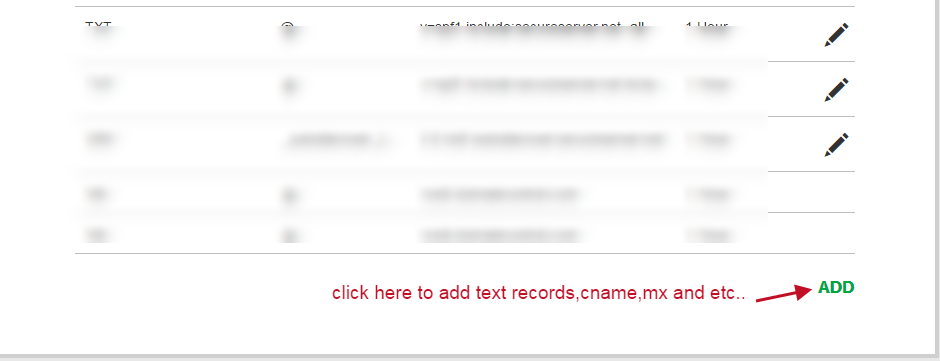
Click on the add button to add all the required values you have got above.

Here you can add all the values like TEXT, CNAME, MX, etc.So just add all the values one by one. In the TTL field, you enter 1 hour as this field indicates the records update time.
 Now you are ready to create your email templates and send them to your users.Note: Once you add the SPF and DKIM records to your domain hosting site then it can take up to 24 hours to update your records.
You can also use the SMTP relay setting to send the emails using another email client like Mailchimp using the PostMark SMTP relay service.
How can you use the PostMark SMTP relay service….?
For using the SMTP relay service you would need the following parameters given below.SMTP Name: You can set any name to recognize Postmark SMTP.HOST: smtp.postmarkapp.comPORT: 587USERNAME/API: Server API token.PASSWORD/Secret KEY: Server API token.How to get this API token using postmark SMTP?
See the image below.
 Using this PostMark SMTP relay setting you can send emails using any third-party email client.You can also go through a few important blog links related to email marketing below: How to stop email from falling into the user’s spam folder.See a few best tips for effective email marketing.Learn Email marketing in Hindi.30+ Best Email marketing service providers study and reviews.8 Best Tips for sending a successful email campaign.Domain Registration vs Domain Hosting In Hindi…Email को Spam folder में जाने से कैसे रोके?…Which domain is best for effective email marketing…What does it mean if your account is suspended?…How badly do emails impact your email campaign…SPF और DKIM रिकार्ड्स क्या होते है, कहा पर मिलते है और कहा पर उन्हें रखना होता है ?…Email marketing क्या है और इसका उपयोग कैसे करते है ?…
How do I check if a sent email ended up in the receiver’s spam box automatically…
हम Email में कितनी बड़ी file attachment भेज सकते है …
Can Yahoo Send Scheduled Emails…
SMTP क्या है और कैसे काम करता है…
Most Common Email Marketing Mistakes In Hindi…
Email Scraping In Hindi…
Email marketing क्या है और इसका उपयोग कैसे करते है…
SPF and DKIM records in Hindi…
5 Free Email Marketing Software…
Using this PostMark SMTP relay setting you can send emails using any third-party email client.You can also go through a few important blog links related to email marketing below: How to stop email from falling into the user’s spam folder.See a few best tips for effective email marketing.Learn Email marketing in Hindi.30+ Best Email marketing service providers study and reviews.8 Best Tips for sending a successful email campaign.Domain Registration vs Domain Hosting In Hindi…Email को Spam folder में जाने से कैसे रोके?…Which domain is best for effective email marketing…What does it mean if your account is suspended?…How badly do emails impact your email campaign…SPF और DKIM रिकार्ड्स क्या होते है, कहा पर मिलते है और कहा पर उन्हें रखना होता है ?…Email marketing क्या है और इसका उपयोग कैसे करते है ?…
How do I check if a sent email ended up in the receiver’s spam box automatically…
हम Email में कितनी बड़ी file attachment भेज सकते है …
Can Yahoo Send Scheduled Emails…
SMTP क्या है और कैसे काम करता है…
Most Common Email Marketing Mistakes In Hindi…
Email Scraping In Hindi…
Email marketing क्या है और इसका उपयोग कैसे करते है…
SPF and DKIM records in Hindi…
5 Free Email Marketing Software…Amazon SES/ Verifying the email address in Amazon…
Amazon Sandbox: How to Increase Email Sending Limit…
