Hello Friends, In this blog post (Send 10000 Emails/Month For Free Of Cost Using MailChimp) I am going to let you know about a useful and important email marketing service that is known as MailChimp.
In this blog post(Send 10000 Emails/Month For Free Of Cost Using MailChimp) we will explore How to set up a MailChimp account. How do I create a Mailchimp account?…..
…… How do I sign up for Mailchimp? How do you use Mailchimp? How do you use Mailchimp step by step?|Send 10000 Emails/Month For Free Of Cost Using MailChimp|
Mailchimp email marketing service has won the hearts of millions by providing an effective email marketing service with lots of various options|Send 10000 Emails/Month For Free Of Cost Using MailChimp|
If we talk about its free plan which is sufficient for beginners whether they are small business owners or bloggers.|Send 10000 Emails/Month For Free Of Cost Using MailChimp|
How many emails can we send free of cost?
You can send 10000 emails/month for free of cost.
Is there any daily quota for free email sending?
Yes, you can send only 2000 emails/day if you are using the free plan of MailChimp.
Can you create a free domain with this free MailChimp account?
Yes! you are allowed to create a custom domain with this free plan.
So, here in this blog, we will cover the step-by-step setup for the MailChimp account, We will see how to verify email and domain using the MailChimp account.
Email and domain verification is the most important step afterward you are ready to send your email campaign.
you can explore the several features of MailChimp like landing pages, signup forms, email automation, creating web pages, etc.
We will discuss some important features of Mailchimp in this blog.
This guide would be very easy even for those who are not much technical. So let’s start the process of setting up a Mailchimp account free of cost.
First, open the Mailchimp website on the browser. Click the below link for the same.
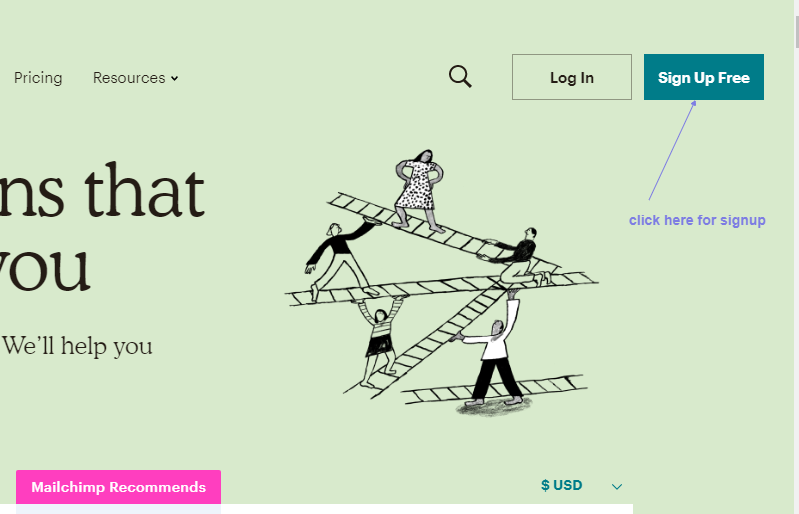
Now click on the tab ‘sign up for free at the top right corner. See the below image for the same.
To complete your signup process, you will just need to fill in some basic information about yourself and your business and website.
So just fill in the appropriate information as per your knowledge and get a successful signup.
Verify Your Email And Domain:
After successfully signing up, the very first thing you should do is verify your domain.
If you are going to use the same email that you have used for signup then you just need to verify that email.
And if it is another email then first you need to add and verify the email with a new domain.
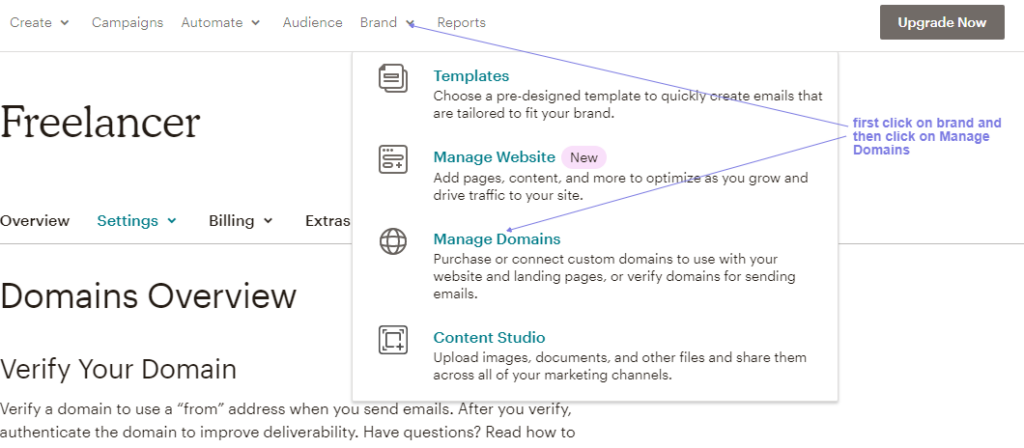
For verifying your domain click on a brand and then click on manage domain. See the below image for the same.
Here is your domain list, you will see only one domain or email that you used in signing up.
Before telling you the process to authenticate this signed-up email or domain, I am just telling you how I can add another email or domain.
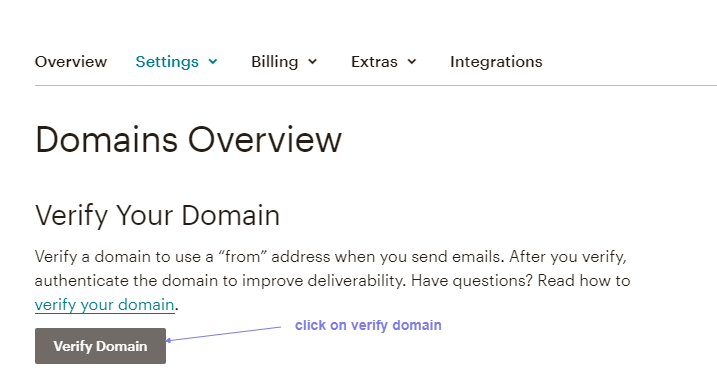
Just click on the verify domain option which is listed above on the same page the domain is listed.
See the below image for the same.
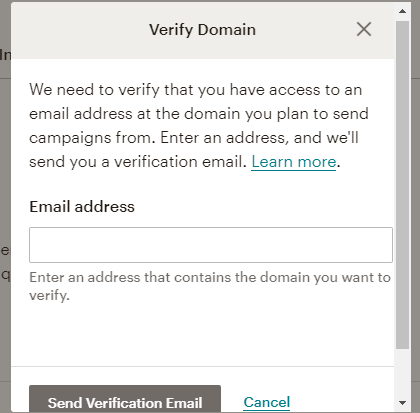
Now enter the full email address with the domain that you want to use for sending the emails.
Then click on ‘Send verification code’ and then check the email and enter the verification code to verify your email.
You can also verify the email by just clicking the verification link inside your email.
So this is just an email verification process. See the below image for the same.
Now your other email has been added to your domain list.
Now if you should know one thing this email verification is not sufficient for identity verification.
How to get SPF and DKIM records?
So, now you will need to authenticate your domain.
When you go to your domain listing by clicking brand->manage DNS, then you will find your email and domain there.
Within your domain you will see a tab to authenticate our domain as ‘authenticate’, when you click this button then you will get SPF and DKIM records for your domain.
See the below image for the same.
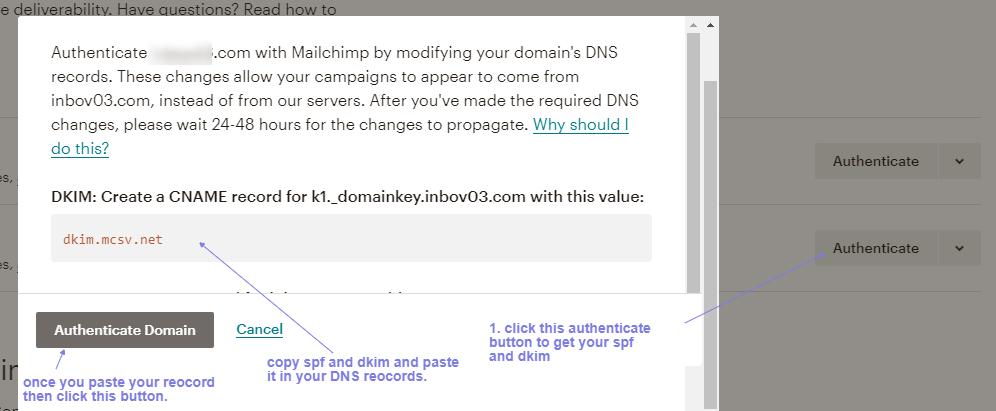
These SPF and DKIM records should be placed on your domain hosting site.
Mean to say if you have purchased your domain from hosting and also hosted at hosting then you will need to place these records in the DNS management of your hosting account.
Always remember your need to place these records on your domain hosting site.
Domain purchase and domain hosting sites may be the same or different.
Format for SPF and DKIM:
SPF and DKIM are the text records, you can see the sample example in the below images.
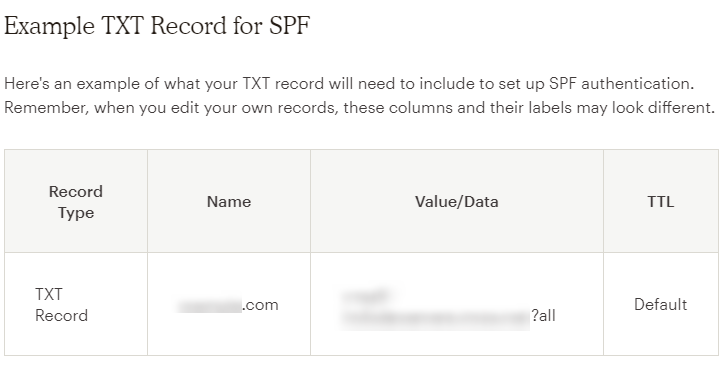
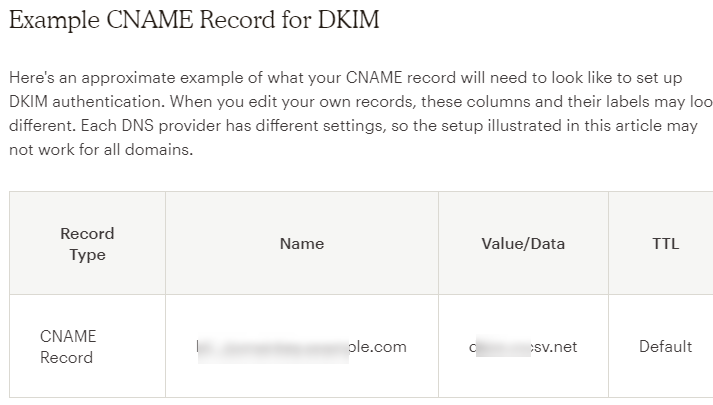
How to place SPF and DKIM records? See an example of whether are we placing these records to GoDaddy in case our domain is hosted at GoDaddy.
You have to add these records to your DNS or domain hosting site.
Let’s assume you have purchased your domain from GoDaddy then you have to add these records to your GoDaddy account.
Sign in to your Godaddy account.

After this click on Manage DNS.

After this click on the DNS setting. see the image below.

After this, you need to add the text records, CNAME, MX, etc.

Once you are done with the addition of the records then you have to click on the verify button. See the below image for the same.

Once you will click the verify button, the work is done from your end.
Usually, it is verified within 1 hour but sometimes it can take 24-48 hours to update the records.
Once your records are verified then you will see the authenticated status in front of your domain. See the below image for the same.

So this was the complete setup for the MailChimp account which covers your email and domain verification.
Now you are ready to upload your email list and send your first email campaign.
You can opt for building beautiful email templates or you can use prebuilt email templates.
you can create website pages, landing pages, and signup forms to build your email list with your subscribers.
A few Important Features of MailChimp are given below.
These are the important features of MailChimp given below. You can explore them.
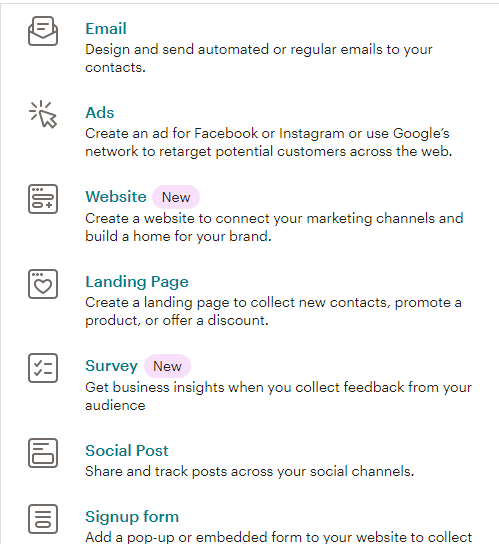
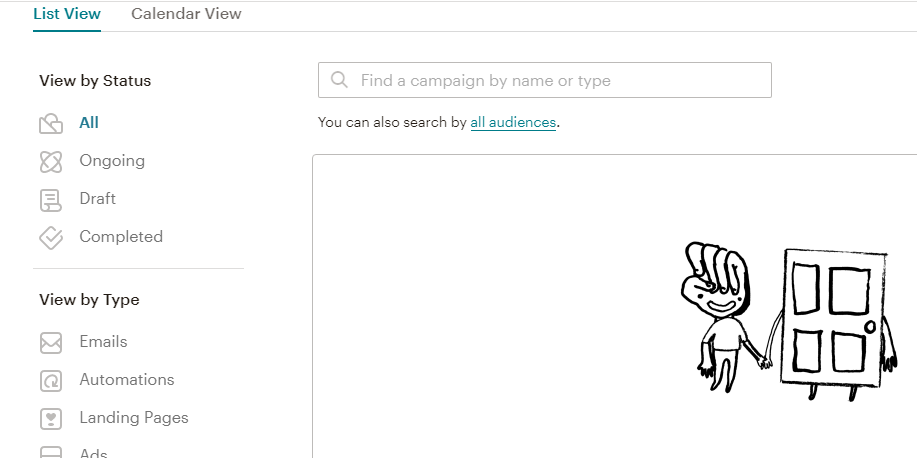
MailChimp Campaign:
You can create and design beautiful email campaigns
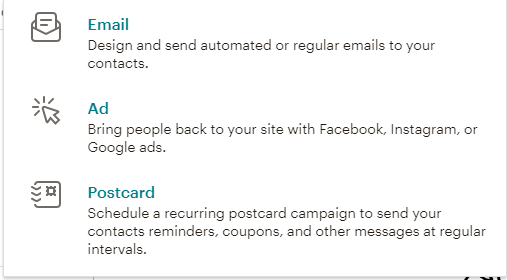
MailChimp Email Automation:
You can create email automation along with additional features like Ads and postcards. See the below image for the same.
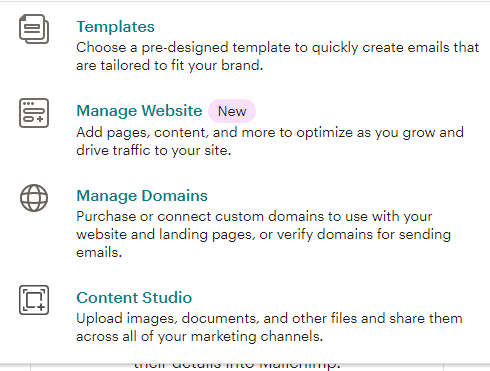
MailChimp Brand:
You can manage your domain along with additional features like templates, a website, and a content studio.
MailChimp Contacts:
You can bring contacts by connecting with a website like e-commerce. You can create a landing page to collect the email leads.

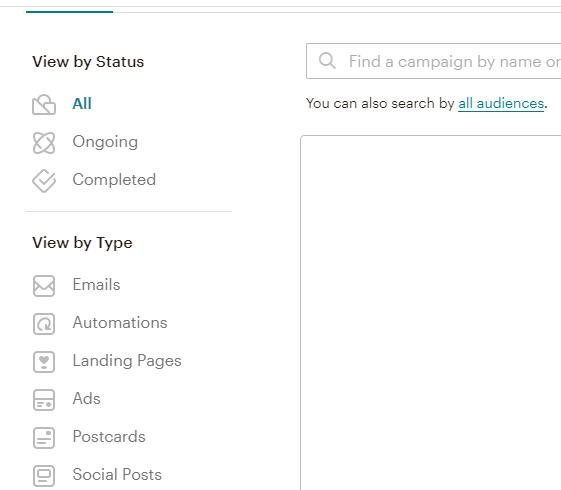
MailChimp Report:
You can see and analyze the stats for your email campaign, here you can see the track for all.
Ongoing, and completed an email campaign. And there is some additional stat for View by type.
See the below image for the same.
You can also go through a few important blog links related to email marketing below:
How to stop email from falling into the user’s spam folder.
See a few best tips for effective email marketing.
Learn Email marketing in Hindi.
30+ Best Email marketing service providers study and reviews.
8 Best Tips for sending a successful email campaign.
Domain Registration vs Domain Hosting In Hindi…
Email को Spam folder में जाने से कैसे रोके?…
Which domain is best for effective email marketing…
What does it mean if your account is suspended?…
How badly do emails impact your email campaign…
SPF और DKIM रिकार्ड्स क्या होते है, कहा पर मिलते है और कहा पर उन्हें रखना होता है ?…
Email marketing क्या है और इसका उपयोग कैसे करते है ?…
How do I check if a sent email ended up in the receiver’s spam box automatically…
हम Email में कितनी बड़ी file attachment भेज सकते है …
Can Yahoo Send Scheduled Emails…
SMTP क्या है और कैसे काम करता है…
Most Common Email Marketing Mistakes In Hindi…
Email Scraping In Hindi…
Email marketing क्या है और इसका उपयोग कैसे करते है…
SPF and DKIM records in Hindi…
5 Free Email Marketing Software…
Conclusion:
So this blog(Send 10000 Emails/Month For Free Of Cost Using MailChimp) was focused on the MailChimp account setup. Here we learned to set up a MailChimp account. The main part of setting up a Mailchimp account was to verify email and domain by putting the SPF and DKIM records at the domain hosting site. After that, we explored a few features of Mailchimp like creating email templates, email campaigns, uploading an email list, and sending an email. This was the Mailchimp account setup guide step by step.
Within this blog post(Send 10000 Emails/Month For Free Of Cost Using MailChimp) we have gone through How to set up a Mailchimp account, How to create a Mailchimp account, How to sign up for Mailchimp, how you use Mailchimp, How do you use Mailchimp step by step.
You can also check it out:
Elastic Email account setup step by step: send 15000 emails/month for free of cost
Elastic Email Free Trial…
MailGun account setup step by step: send 10000 emails/month for free of cost
In the case of any queries, you can write to us at a5theorys@gmail.com we will get back to you ASAP.
Hope! you would have enjoyed this post about Sending 10000 Emails/Month For Free Of Cost Using MailChimp.
Please feel free to give your important feedback in the comment section below|Send 10000 Emails/Month For Free Of Cost Using MailChimp|
Have a great time!

I don’t think the title of your article matches the content lol. Just kidding, mainly because I had some doubts after reading the article.
I don’t think the title of your article matches the content lol. Just kidding, mainly because I had some doubts after reading the article.